
Quick start guide
This guide takes you from creating your Eventually account to seeing your first ticket sale. There are five steps: create your account, connect your Squarespace site, publish your first event, put the calendar widget on your site, and start selling.
1. Create your account
Open the signup page on eventuallyticketing.com. The Create an account form asks for your name, email address, and password; click Create account.
You land on your dashboard on the Free plan right away. Free includes 3 active events, up to 25 attendees per event, and 3 paid orders for the life of the account, so you can test a handful of real sales before upgrading. Plan details: Billing and plans.
2. Connect your Squarespace site
Connecting your site is what lets tickets check out through Squarespace Commerce on your own website. You need owner or admin access to both Eventually and the Squarespace site.
Go to Settings → Payments and find Squarespace Commerce.
Click Connect Your Squarespace Site.
Squarespace opens in a new step. Log in if prompted, select the site you want to connect, review the permissions, and click Allow.
You return to Eventually and the card shows the site as connected.
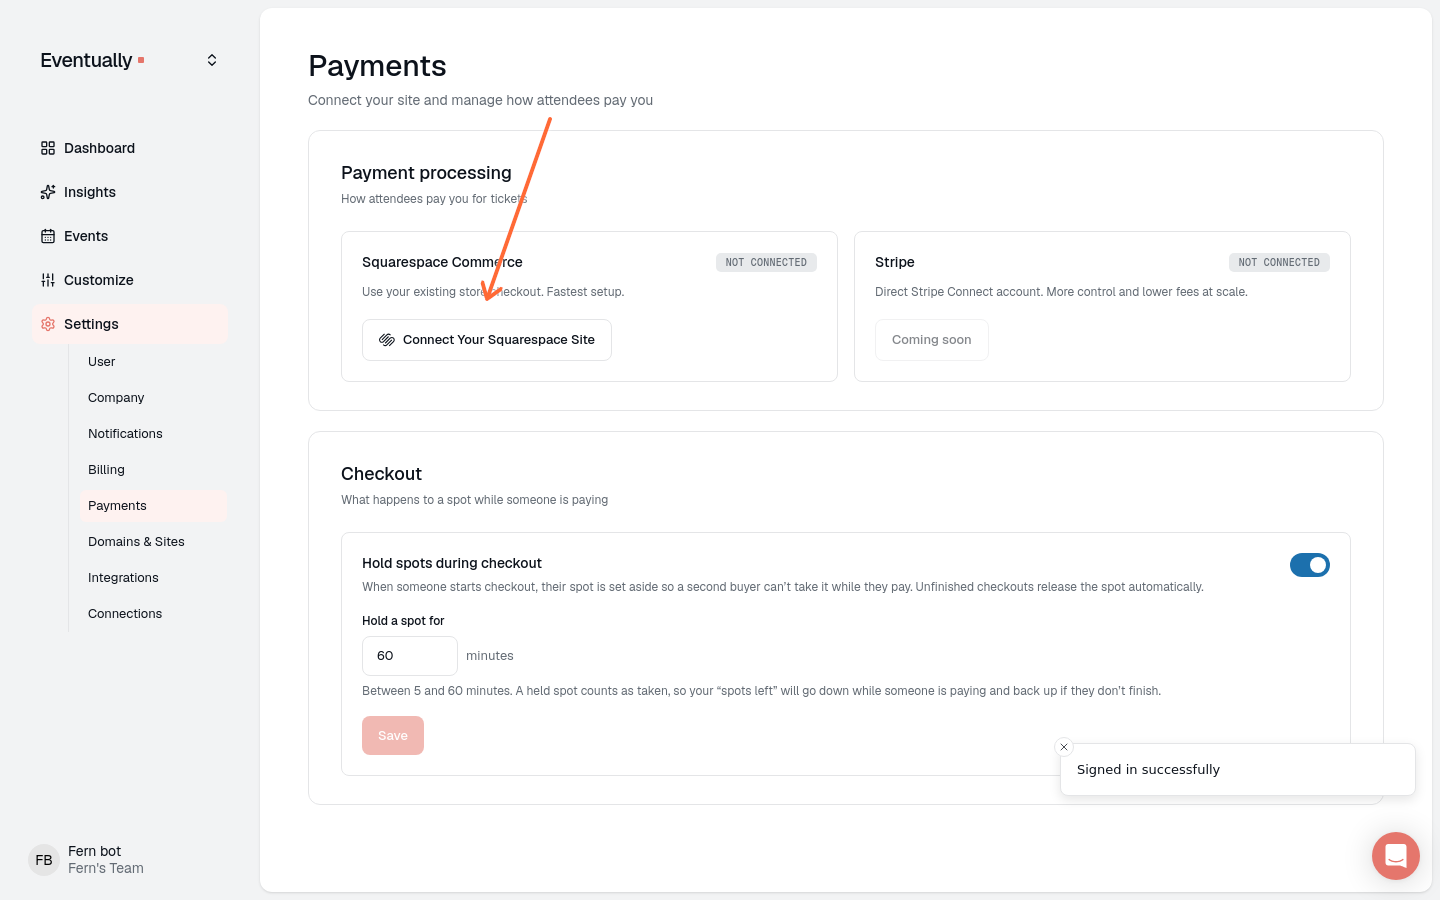
To sell paid tickets, your Squarespace site also needs a Store page that is turned on. If Eventually cannot find one, it tells you and offers to check again once you have fixed it. Full connection steps and troubleshooting: Connect your Squarespace site.
3. Create and publish your first event
Only three things are required to publish an event: a name, a date and time, and at least one ticket type. External-registration events additionally require a valid Registration URL. Everything else (location, description, image, registration questions) can be added later.
From your dashboard, click manually create your event.
Fill in the Event name and Date and time. The time you set also sets the event's time zone.
In the Tickets card, choose Free, Paid, or External registration. Paid tickets check out through your Squarespace store.
Set Capacity to cap attendance, or leave it unlimited. Per-ticket limits and pricing details: Set event capacity and ticket limits.
Click Publish event at the bottom of the page.
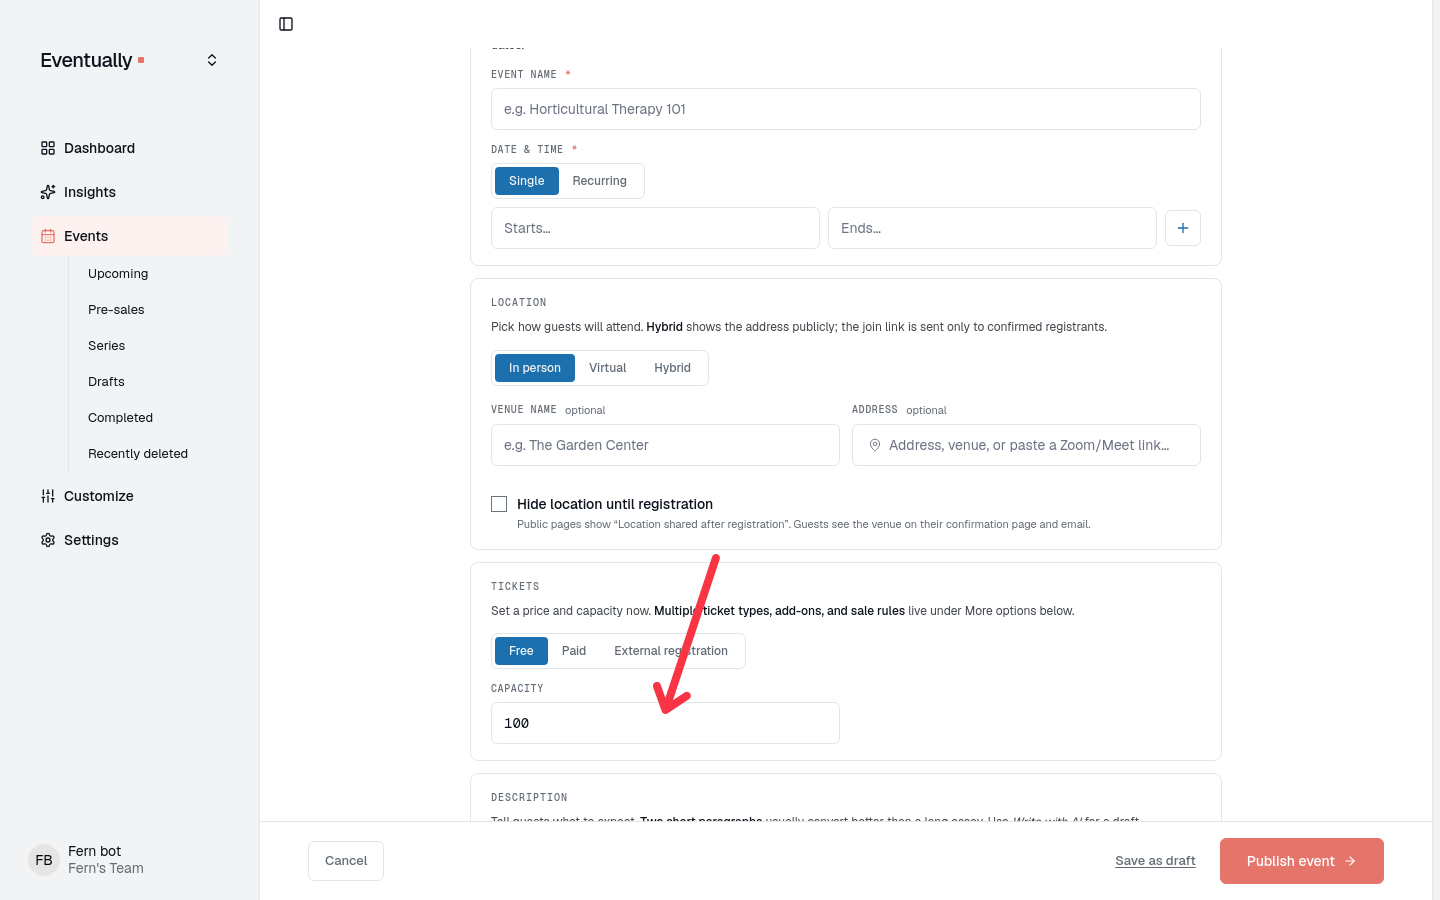
Publishing a paid event before checkout is connected opens To sell tickets, connect your Squarespace store. You can Connect Squarespace and then publish again, publish it as free with Keep it free, or publish now with continue — sales open when you connect. Detailed field-by-field walkthrough: Create an event.
4. Put the calendar widget on your site
The calendar widget is how visitors see and register for your events on your Squarespace site.
In Eventually, go to Customize → Calendars, then open your widget or click New widget.
Click Copy embed code.
In Squarespace, open the page where you want the calendar and add a Code block.
Paste the embed code into the block, then save and publish the page.
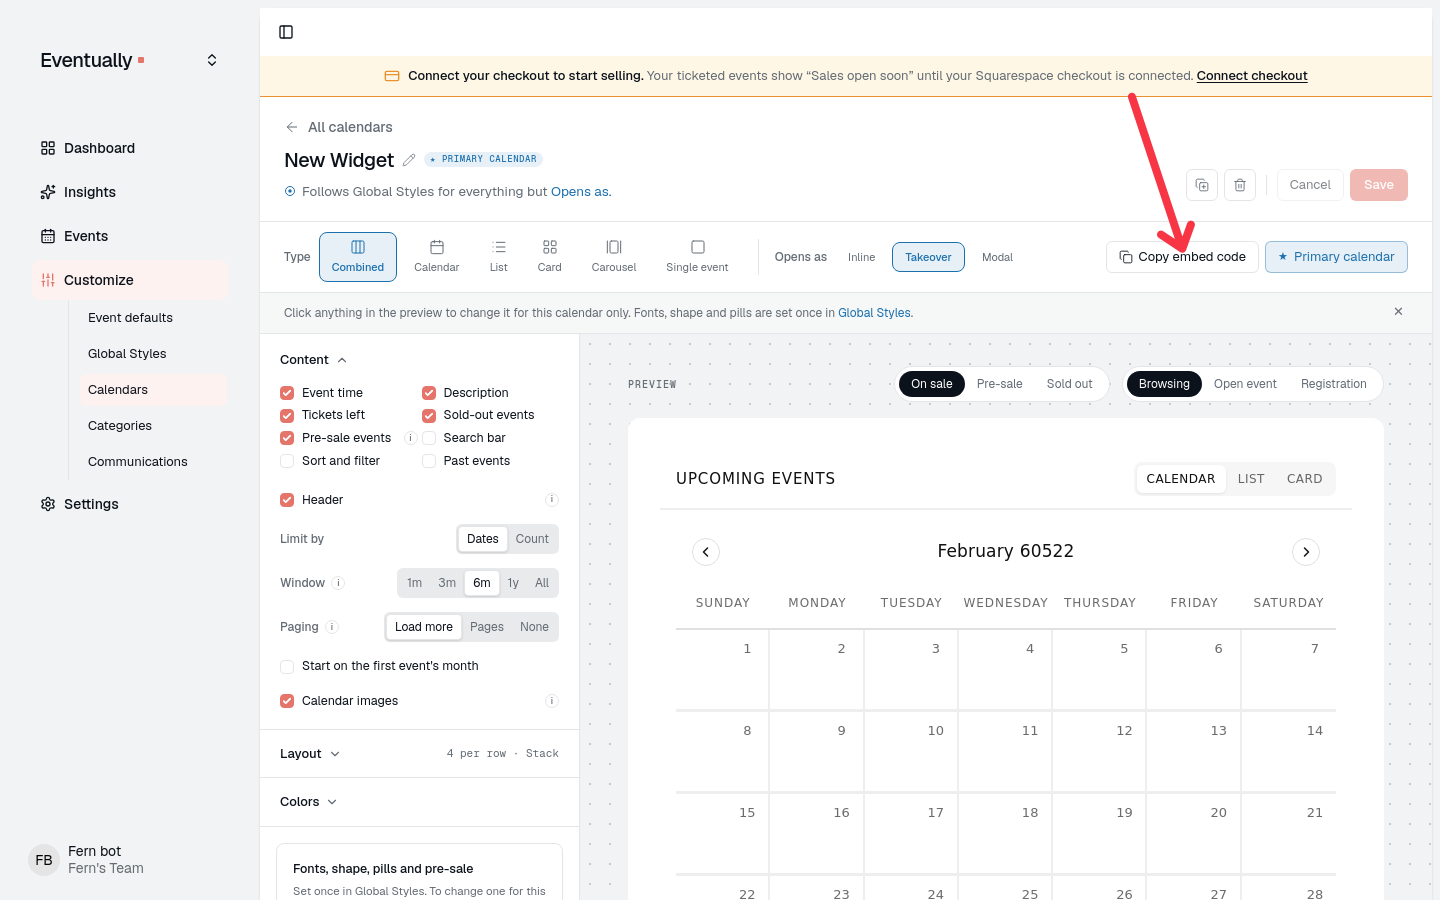
The widget updates automatically when you create, edit, or cancel events, so you never re-paste the code. Full embed walkthrough: Embedding the calendar widget on Squarespace.
5. Sell your first ticket
Buyers pick tickets from your widget, add them to your Squarespace cart, and complete checkout on your site through Squarespace Commerce. Nothing sends them to an external ticketing page. What the buyer sees: How checkout works for your attendees.
Paid ticketing is an Essentials feature, but your first 3 paid orders work on Free. After that, upgrade (Settings → Billing) to publish a new paid event. Events you have already published keep selling.
Understanding your Events dashboard
The sidebar is your map to every view: Dashboard is your home page, Events holds your event lists, and Insights answers questions about your event data.
The Dashboard home shows your upcoming events with a registration count on each row, plus an Activity feed of recent registrations. Click View all under Upcoming events to open the full Events list.
Events → Upcoming lists every event, one row per date. Each row shows the date, title, and time, with a progress bar and a registrations-versus-capacity count, or SOLD OUT when the event fills and LIVE on the event day. In-person and hybrid rows also show the venue. A virtual event's row leaves the venue blank; a join link pasted as the event location still shows in the row. Search by name, filter by category, and switch between List and Calendar views. Click any row to open the event detail page with its stats and guest list.
A recurring event gets one row per session, each marked with a repeat icon. Open the Series tab to see them grouped instead: one row per series, showing the next session date and how many sessions are upcoming or past. Expand a series row to see its sessions and click a session to open it.
Drafts, Completed, and Recently deleted under Events hold events in those states. If your sidebar shows Insights, open it to ask questions about your events and get answers from your event data.
Watch sales come in
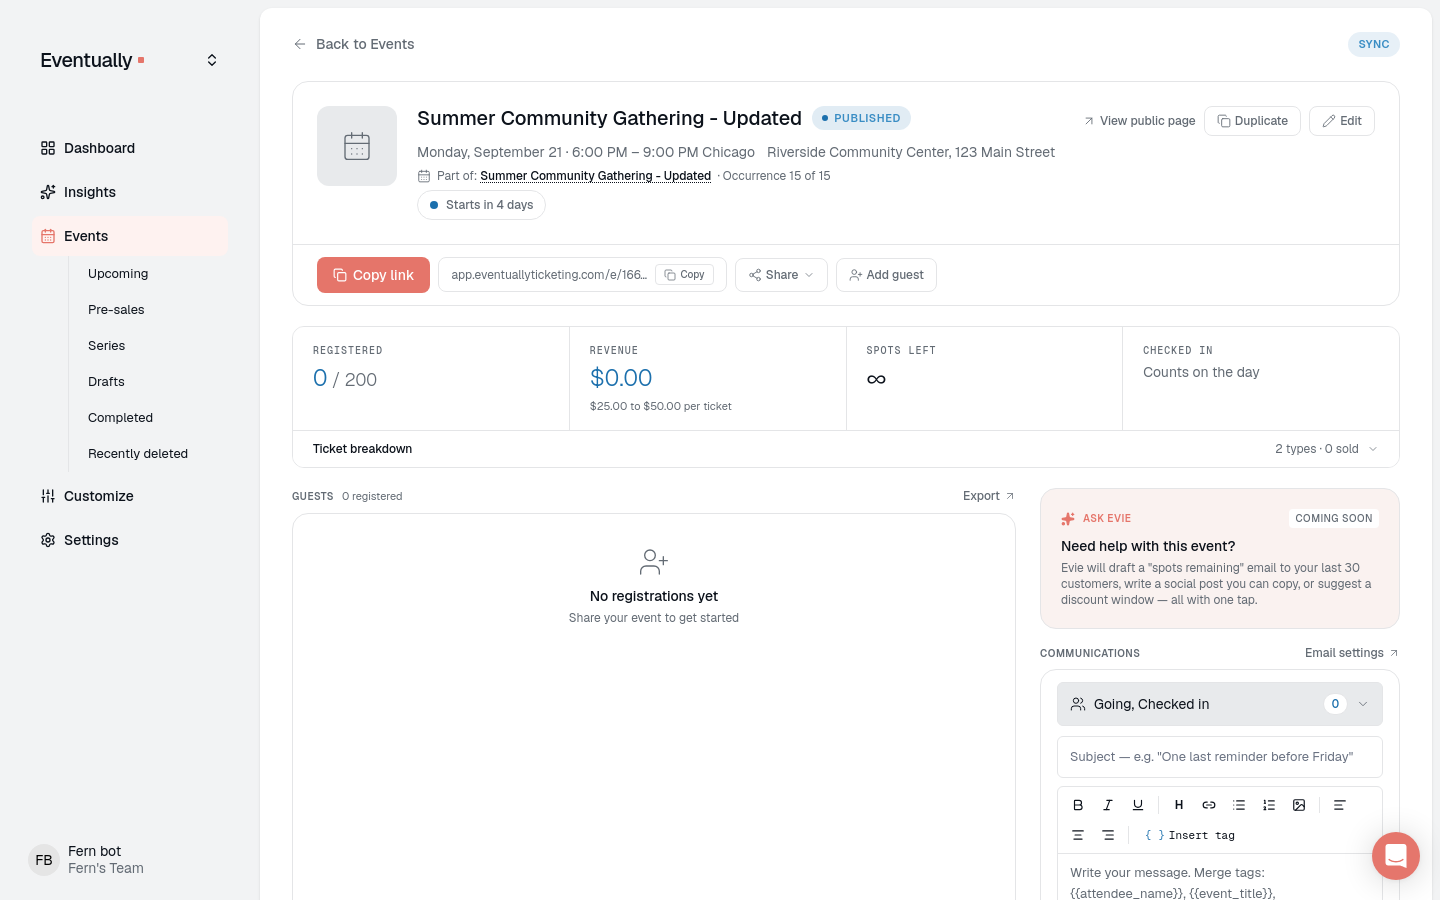
Open your event from the dashboard to see Registered, Revenue, Spots left, and Checked in at the top of the page. The Guests section lists every registration and has an Export button.
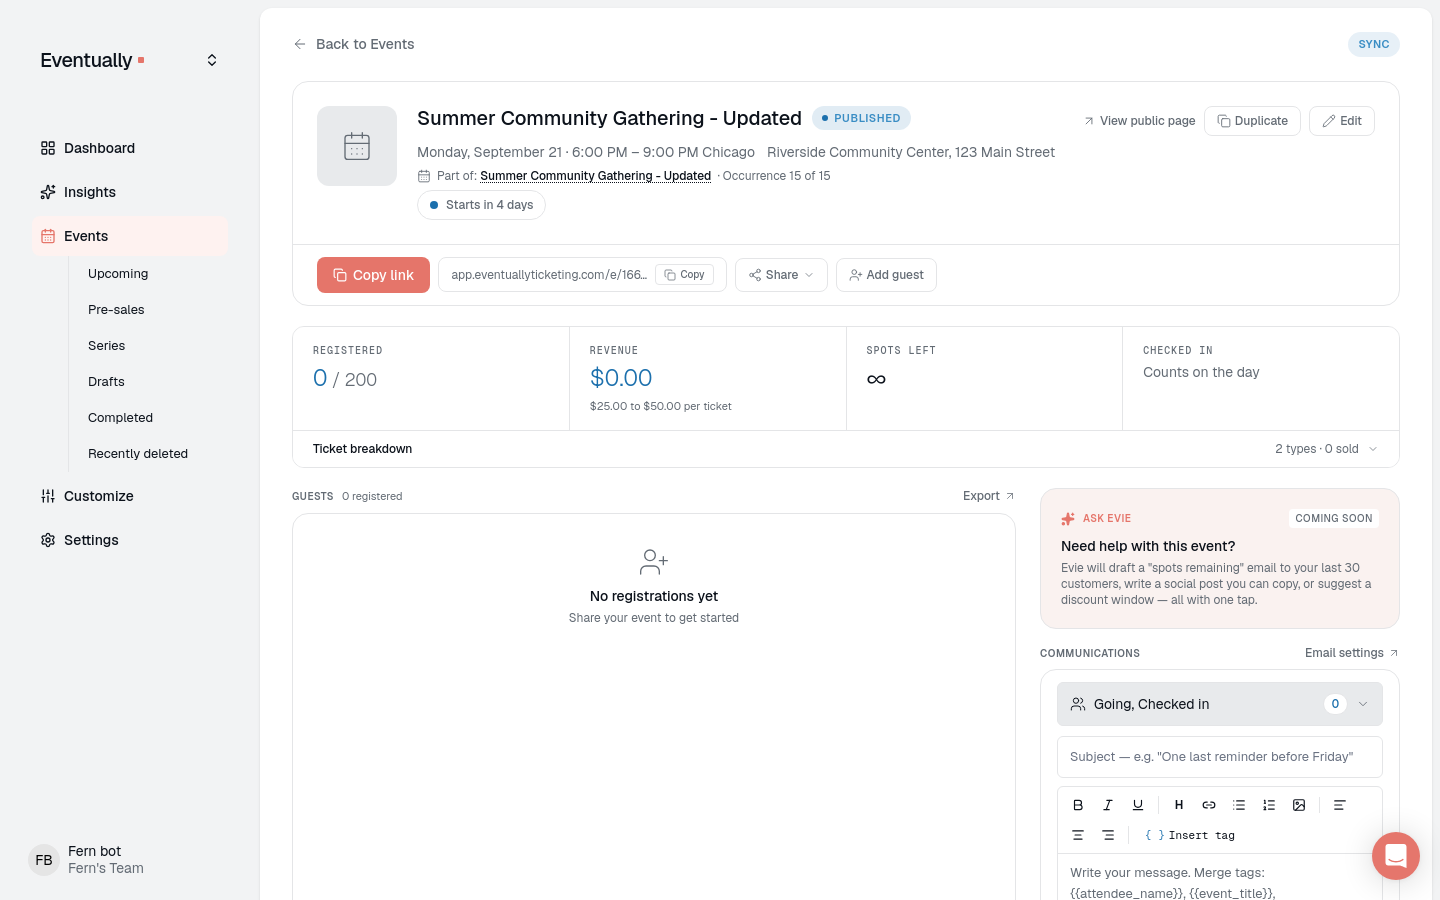
Click any guest for their details, including Ticket Type, Amount Paid, Order ID, and Source (a Squarespace sale shows Squarespace). More on the roster: The attendee detail view.
Where to go from here
Create an event: Full field-by-field event setup
Connect your Squarespace site: Checkout connection and troubleshooting
Creating ticket tiers and pricing: Multiple ticket types and prices
Syncing your brand from Squarespace: Pull your logo, colors, and fonts into the widget
Setting up automated emails: Branded confirmations and reminders
Using QR code check-in: Check attendees in at the door