
Guest transfer links only appear when Guest ticket transfers is enabled, the transfer window is still open, the ticket is active, the attendee is not checked in, and the registration is not an add-on. If a guest opens a manage link after the cutoff, or when self-serve is off, they see that the link isn't available and should contact the host.
Transfer a ticket to a different attendee
Transferring a ticket means giving the same ticket to a different person. It does not change the event, class, or ticket tier, and add-ons do not transfer with the ticket. If you need to change the guest's ticket type or move them to a different class, see Change a guest's ticket tier or move them to a different class.
You can reassign an active ticket from the attendee dashboard at any time, or let guests transfer themselves when you turn on Guest ticket transfers. Checked-in active tickets can still be transferred by organizers, but inactive tickets can't use this transfer workflow.
Enable guest ticket transfers
Turn on Guest ticket transfers in the event's Tickets & capacity section so ticket holders can start a transfer from their confirmation page or order confirmation email.
Open the event in your Eventually dashboard.
Expand the Tickets & capacity section.
Turn on Guest ticket transfers.
Under Allow until, choose when the transfer window closes:
the event ends (default when unset)
1 hour before start
24 hours before start
48 hours before start
Both settings save as soon as you change them; there is no separate save step.
Guests can transfer their ticket to someone else from their confirmation page. The current holder confirms by email before anything moves.
Organizer transfers from the attendee dashboard work whether or not Guest ticket transfers is enabled. Guest-facing transfer links only appear while the window is open, the ticket is active, the attendee is not checked in, and the registration is not an add-on.
Transfer from the attendee dashboard
Owners and admins can transfer a ticket directly from an attendee's record in the Guests section.
Open the event in your Eventually dashboard and scroll to the Guests section.
Click the attendee whose ticket you want to transfer.
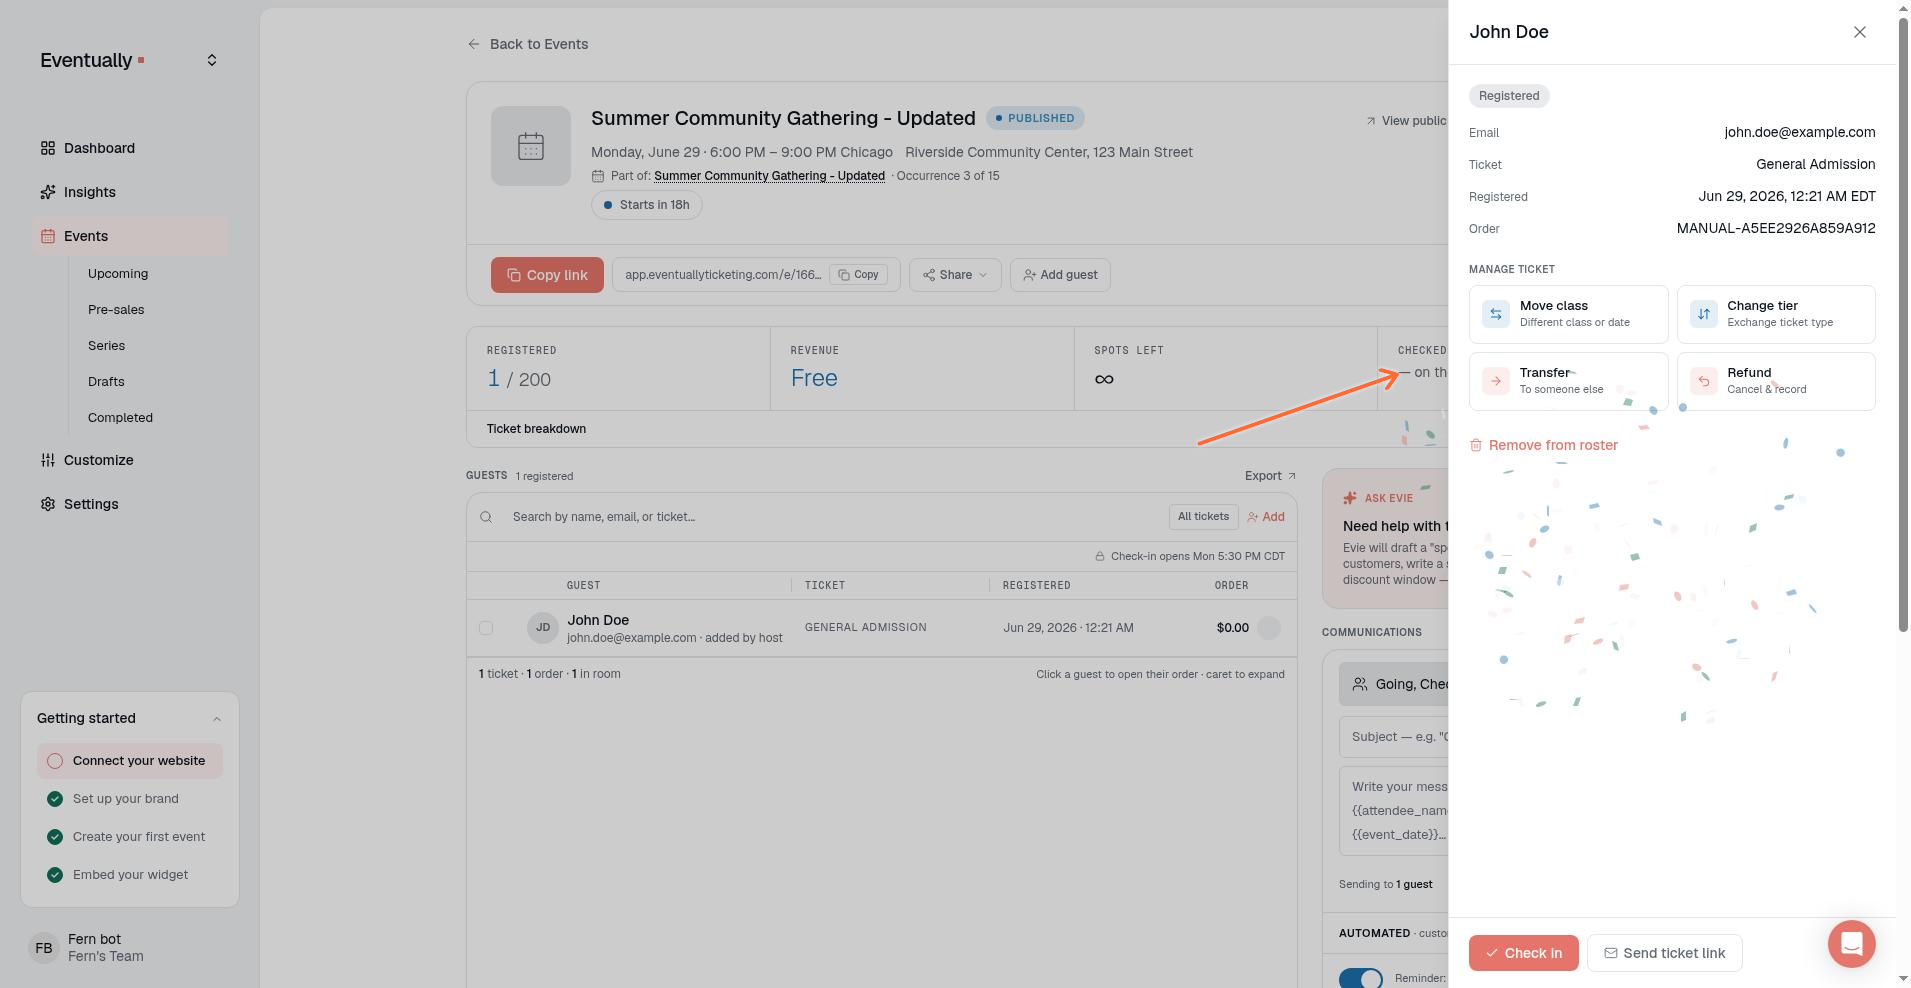
In the attendee detail modal, click Transfer under Manage ticket.
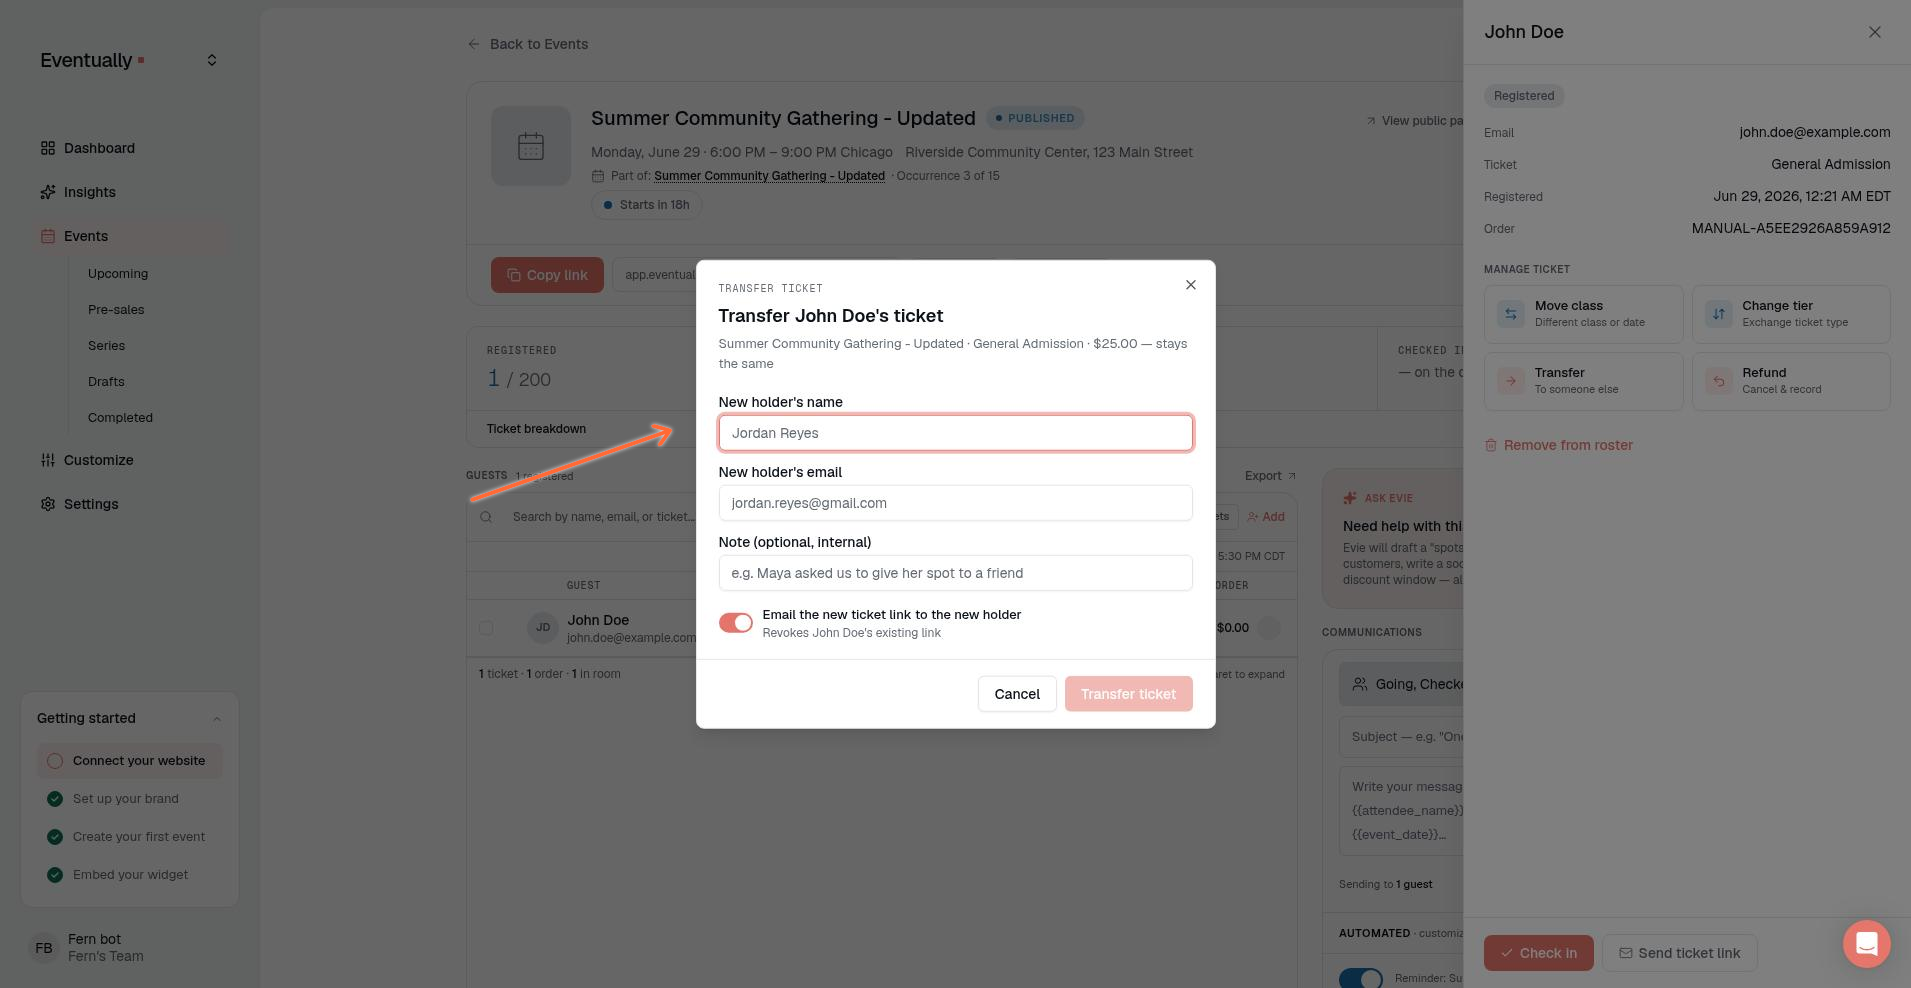
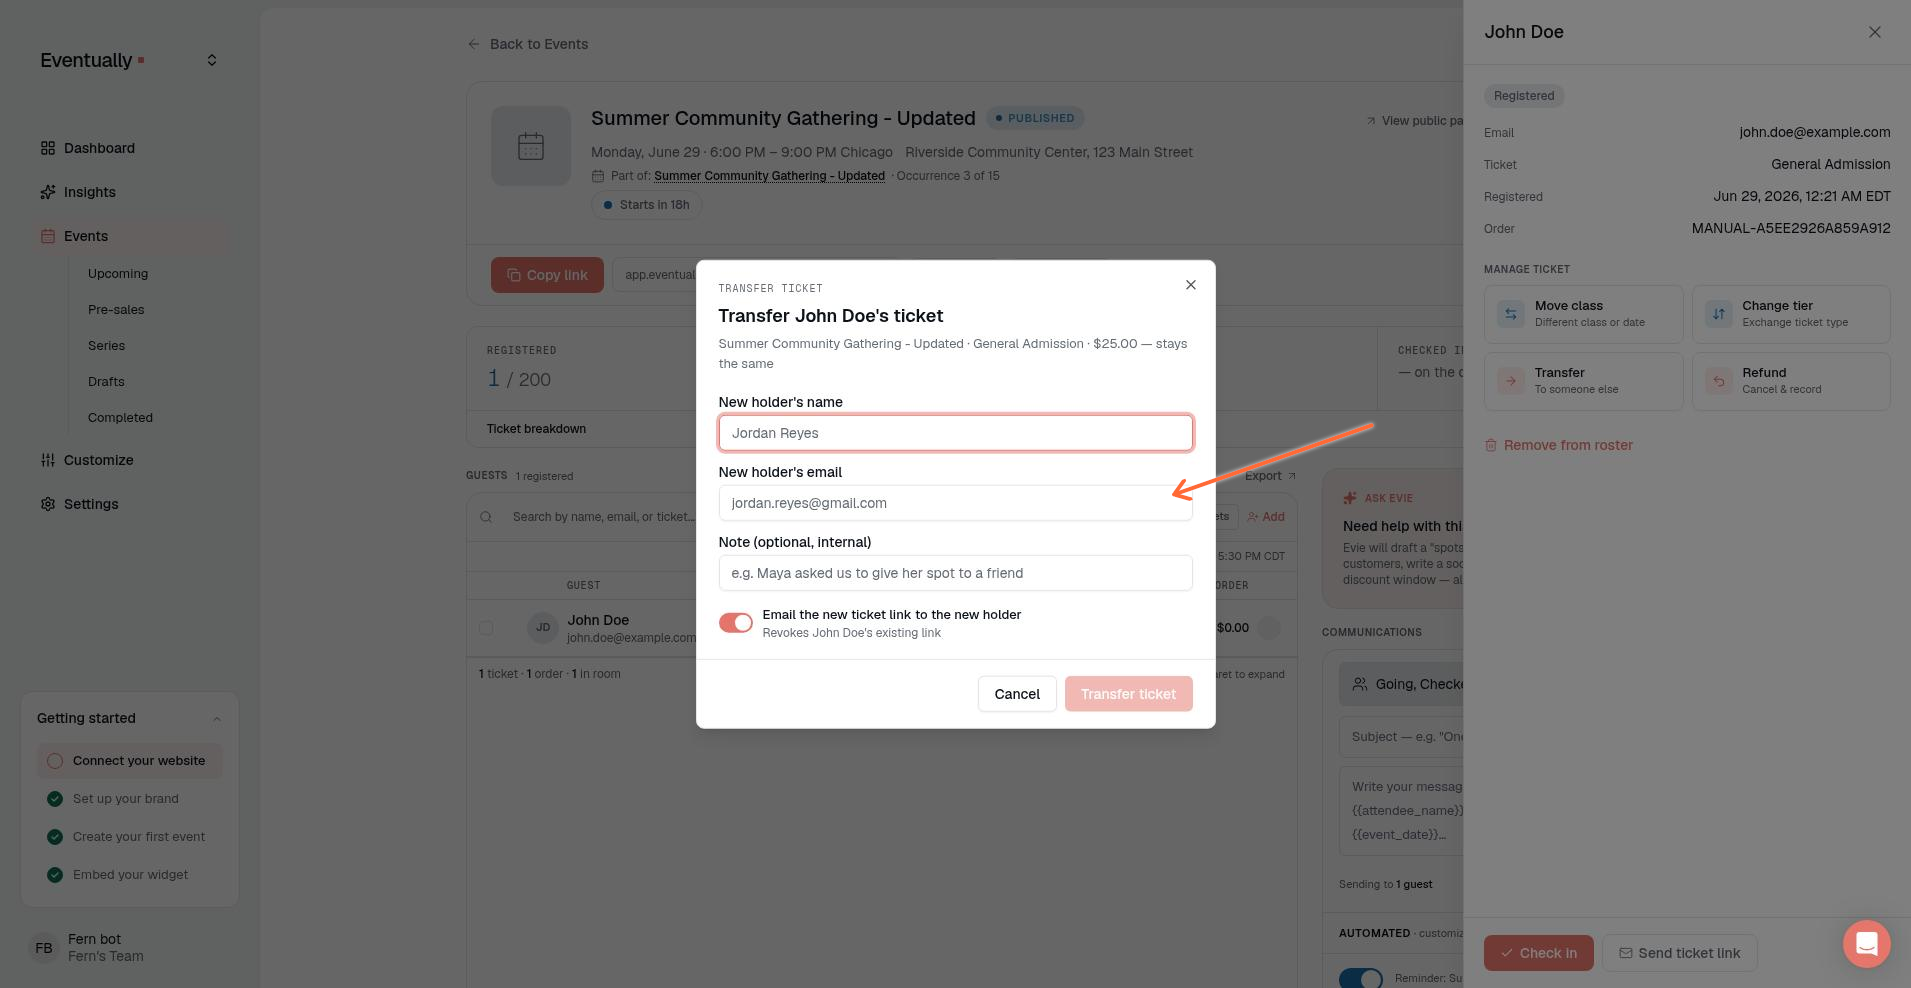
Enter the new holder's name and a valid email address in New holder's name and New holder's email.
If the registration has more than one seat, choose how many to move under Tickets to transfer. Remaining seats stay with the current holder.
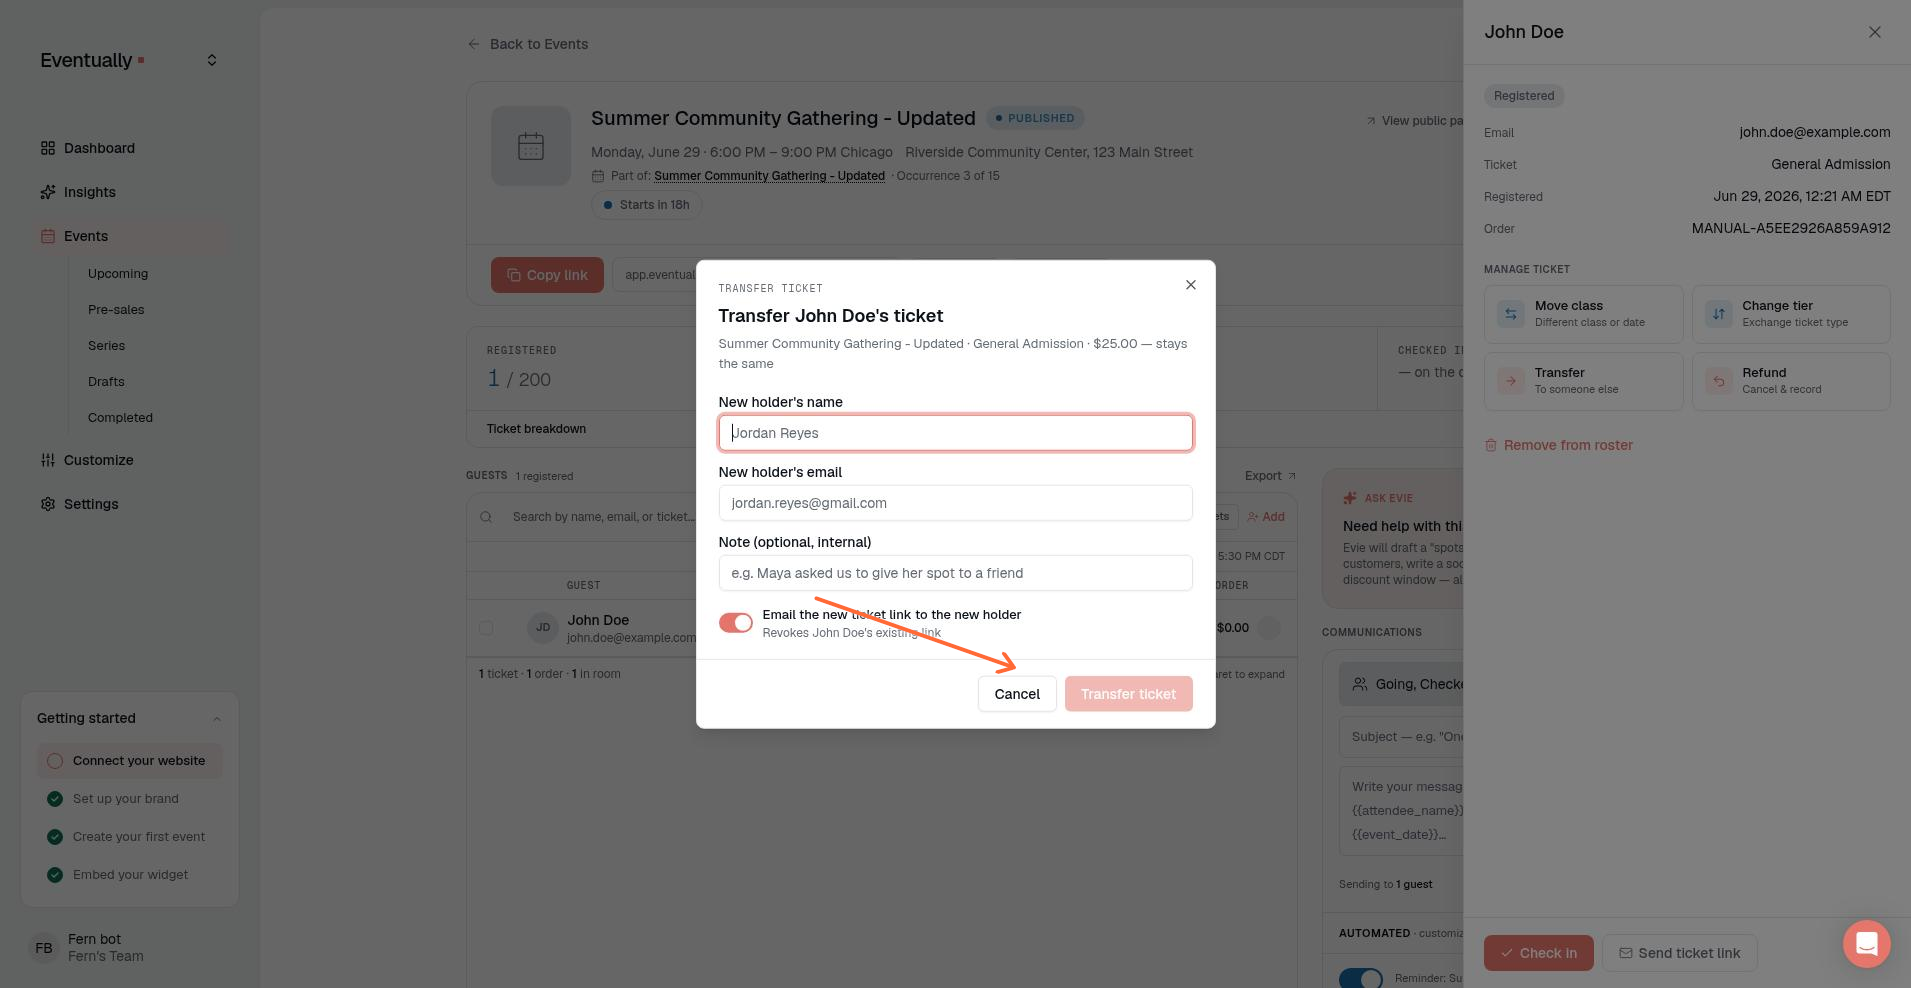
Optionally add a note and use the switch to email the new ticket link.
Click Transfer ticket.
The new holder receives the ticket email when the email switch is enabled, and a QR code when QR codes are enabled.
Guest-initiated transfer
When Guest ticket transfers is on and the transfer window is open, ticket holders can start a transfer without contacting the host.
Where guests find the transfer link
Guests can open the transfer flow from these places while transfers are available:
Confirmation page: multi-ticket orders show Transfer this ticket on each eligible ticket. Single-ticket orders show a Can't make it? card with Transfer your ticket to someone else.
Order confirmation email: includes Can't make it? Transfer your ticket to someone else from your order page, which opens the confirmation page so a fresh transfer link can be used.
Manage your ticket: the self-serve manage page for that registration.
The transfer window follows the host's Allow until setting. It is separate from confirmation-link expiry: a closed window removes guest transfer access even if an older email is still available.
Complete a guest transfer
The ticket holder opens the manage page from the confirmation page transfer link or their order page.
They enter the new holder's name and email.
If the registration has more than one ticket, they choose a quantity under How many tickets to transfer. Options include All N tickets or a smaller count such as 1 ticket.
They click Transfer ticket.
We email the current holder a confirmation link. They must confirm within one hour before the ticket moves.
After confirmation, the new holder receives their own confirmation email with the transferred ticket.
The transfer is only complete after the current holder confirms. Until then, nothing has changed.
Partial transfers for multi-seat registrations
On a multi-seat registration, guests can transfer some seats and keep the rest. Series tickets are the exception: they transfer only as a whole, as described under Common issues.
A partial transfer moves only the selected quantity to the new holder.
Remaining seats stay with the original holder. Their manage link and QR code stay valid for the seats they kept.
A full transfer moves every seat. The original holder's old link and QR code stop working.
Branded transfer pages
Self-serve manage and confirmation pages use the host's primary brand color for the header, buttons, and focused inputs, with contrast-safe text so labels stay readable on light or dark brand colors. When a brand logo is available, it appears on the self-serve page.
Common issues
Guest transfer links are missing or say the link isn't available
"That's the current holder. Enter a different person's email to transfer."
The email you entered already belongs to the current ticket holder. Use a different email address.
"Enter a valid email address."
The email address is malformed or missing. Check for typos and try again.
"This link has expired" (guest-initiated transfers)
The email confirmation link for the transfer request is time-limited (one hour). The ticket holder must return to the manage page and request the transfer again. This is separate from the host's transfer window cutoff.
Transfer couldn't complete
If a transfer fails after confirmation, nothing changes on the original ticket. Start the transfer again from the attendee dashboard, or ask the ticket holder to request a new transfer from their manage page while the window is still open.
Checked-in or inactive tickets can't be transferred by guests
Self-serve transfer is blocked for tickets that are already checked in or no longer active. Use the attendee dashboard transfer when you need to reassign those seats as an organizer.
A series ticket can't be transferred in parts
A series ticket covers every session of its Event Series, so it moves only as a whole. Partial transfers are refused with "Session seats follow their series ticket. Transfer the whole series ticket instead." Splitting a series ticket is refused with "A series ticket can't be split. Transfer the whole series ticket instead." Moving it to a different event or exchanging it is also refused. Its generated session seats follow the ticket automatically.
Related guides
Was this helpful?
Was this helpful?