
Set up your calendar widget
The calendar widget displays your events on any Squarespace page. Visitors can browse your schedule, view event details, and purchase tickets, all without leaving your site.
Create a calendar widget
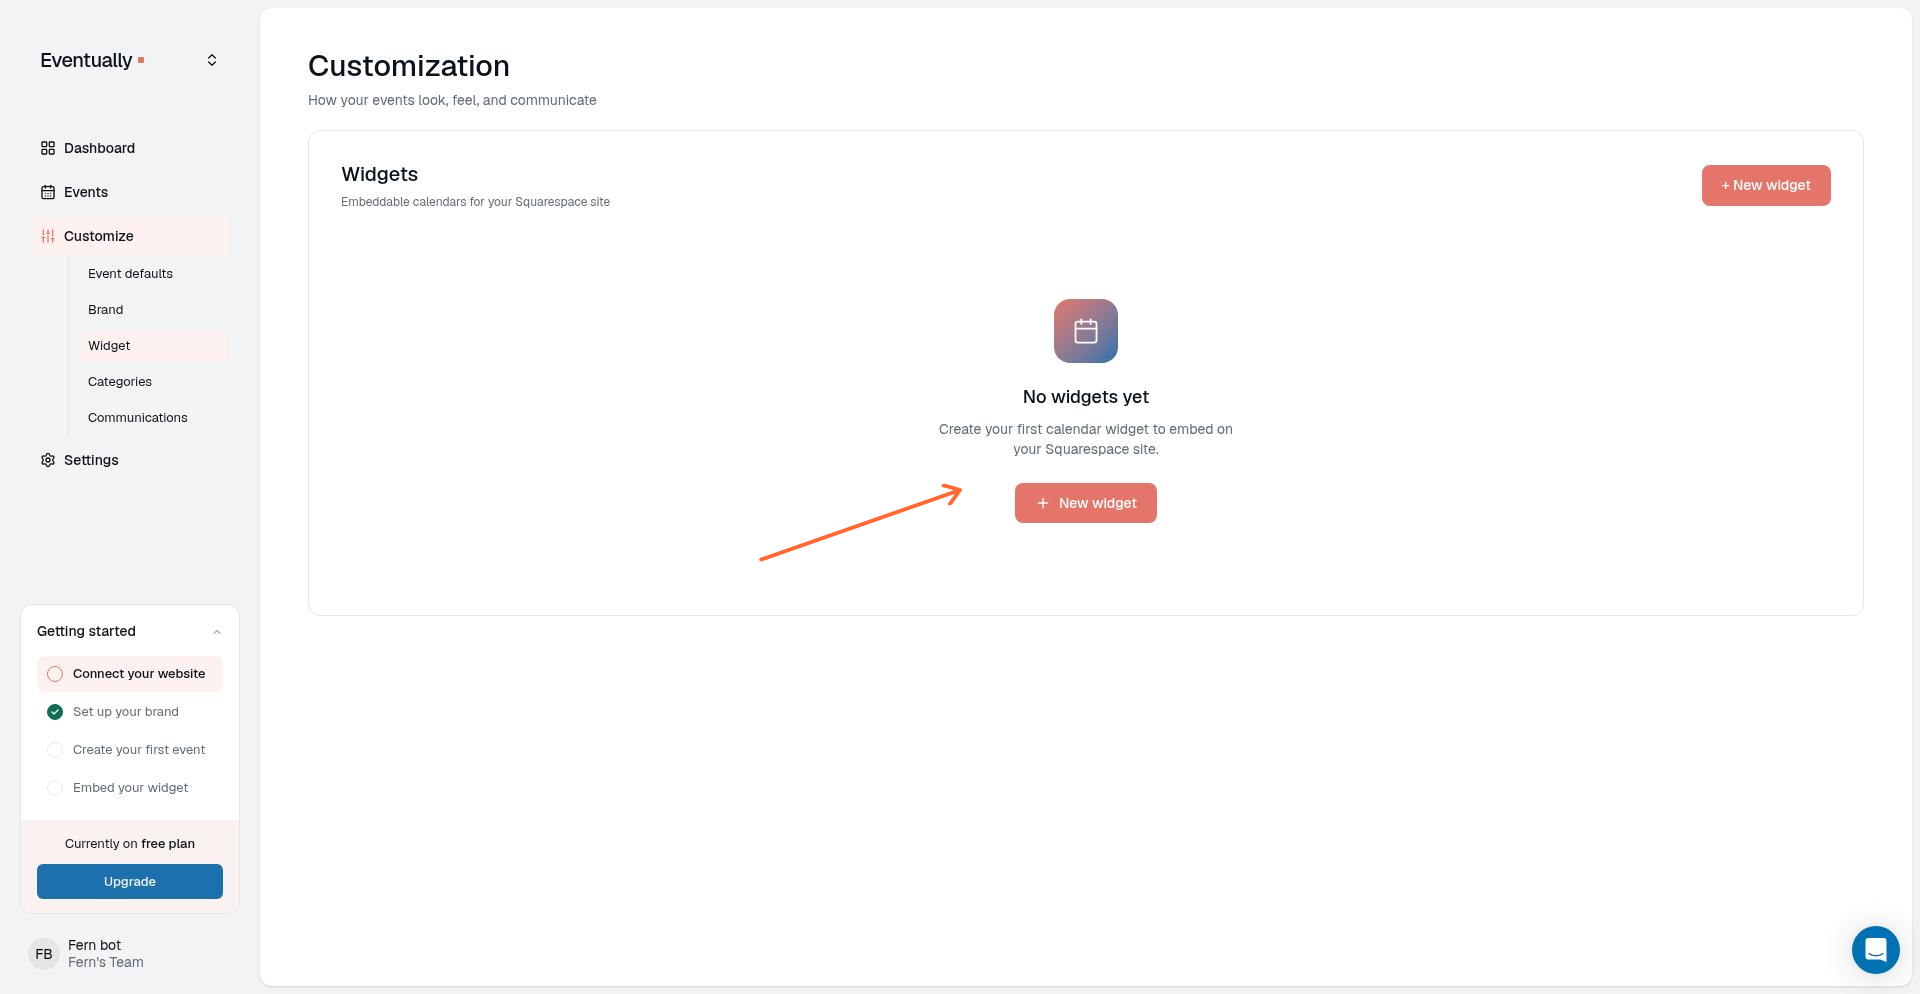
Go to Customize → Calendars in your Eventually dashboard.
Click New widget.
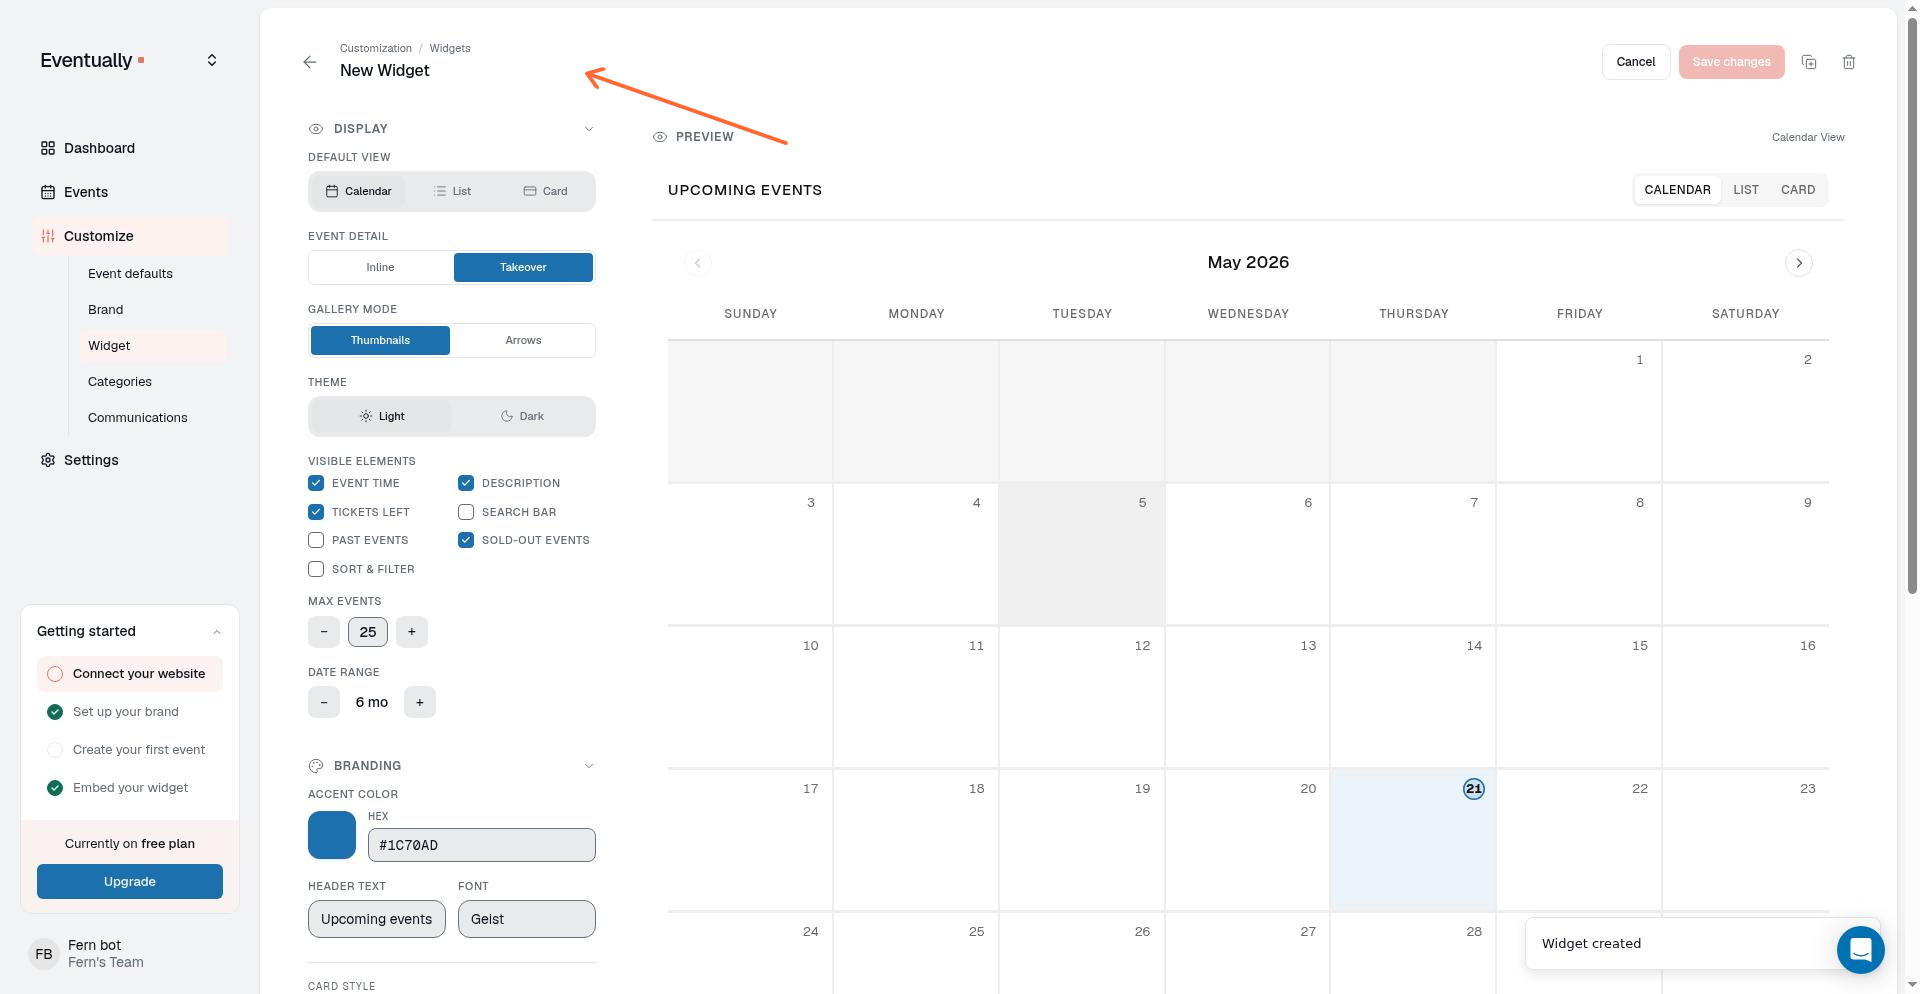
Edit the widget name from "New Widget" to something descriptive.
After first publish
Your first-run single publish opens brand and embed setup in the dashboard drawer. Bulk publish, CSV first publish, demo mode, and already-finished onboarding open Set up your widget, where a default widget may already be seeded for the live preview and embed code. Either handoff is separate from creating widgets in Customize → Calendars. Use this article when you want full builder controls, folders, filters, or single-event layouts.
See also Finish setup on your dashboard for brand sync or skip, first embed or public-link copy, and how copied differs from live detection. Owner-only draft previews in the setup drawer are not live embeds.
Choose the widget layout
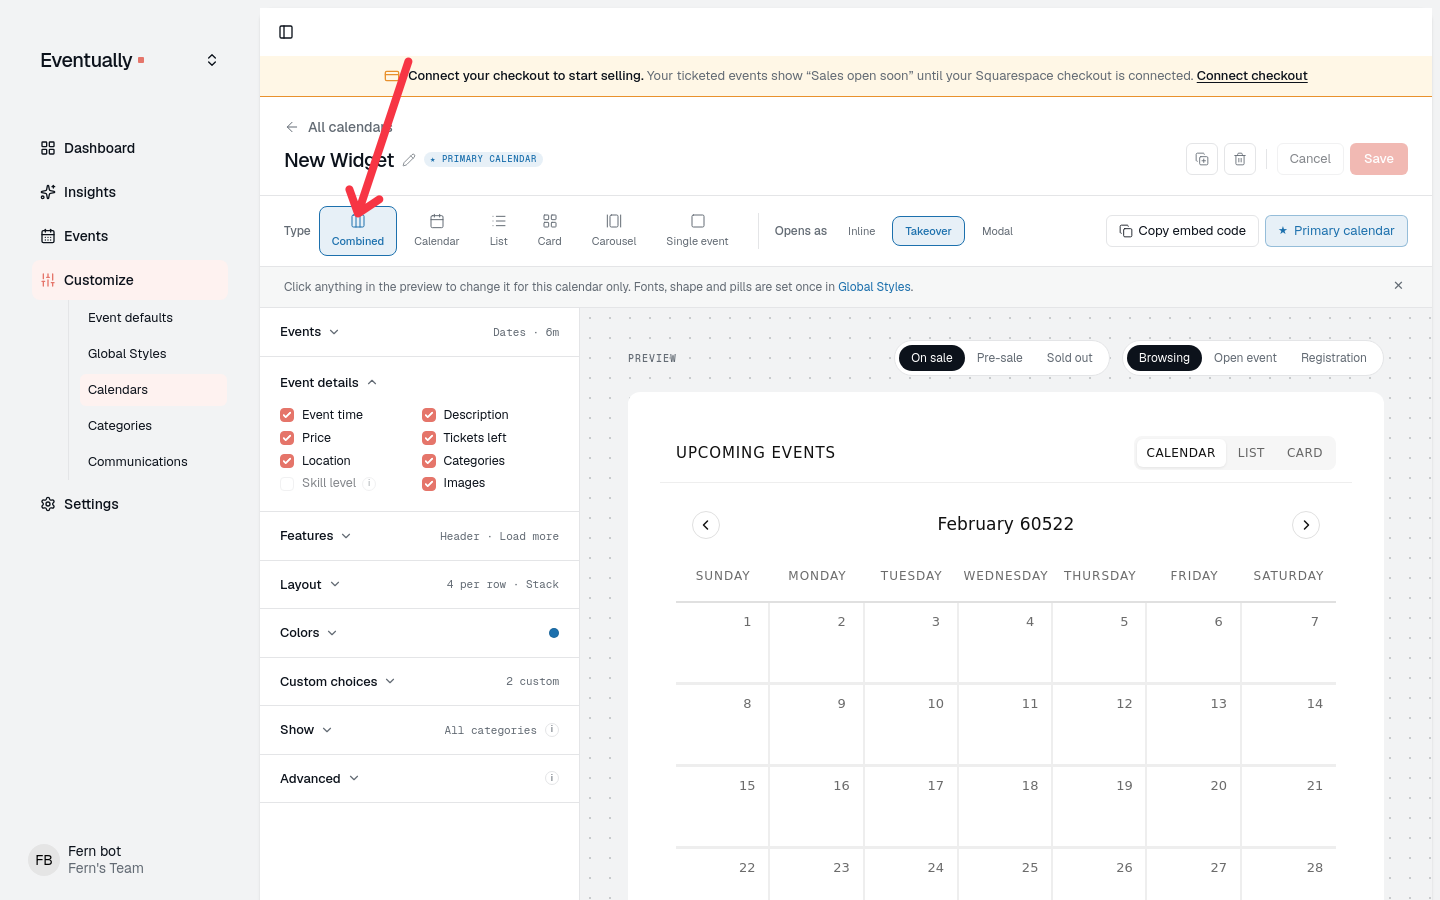
The widget builder offers six layouts as buttons at the top of the builder: Combined, Calendar, List, Card, Carousel, and Single event. In the older widget builder, the same buttons sit in the Embed code section. The live preview updates as you switch, so you can check the result before you copy the embed code.
Layout | What visitors see | Good for |
|---|---|---|
Combined | Calendar, List, and Card views with a toggle | Letting visitors switch between views |
Calendar | Calendar view only | Events spread across different dates |
List | List view only | Mobile displays or simple event schedules |
Card | Card grid only | Highlighting featured events |
Carousel | A horizontal scrolling image reel | Showcasing event images in a compact strip |
Single event | One specific event | A featured workshop, class, or registration-focused landing page |
Combined
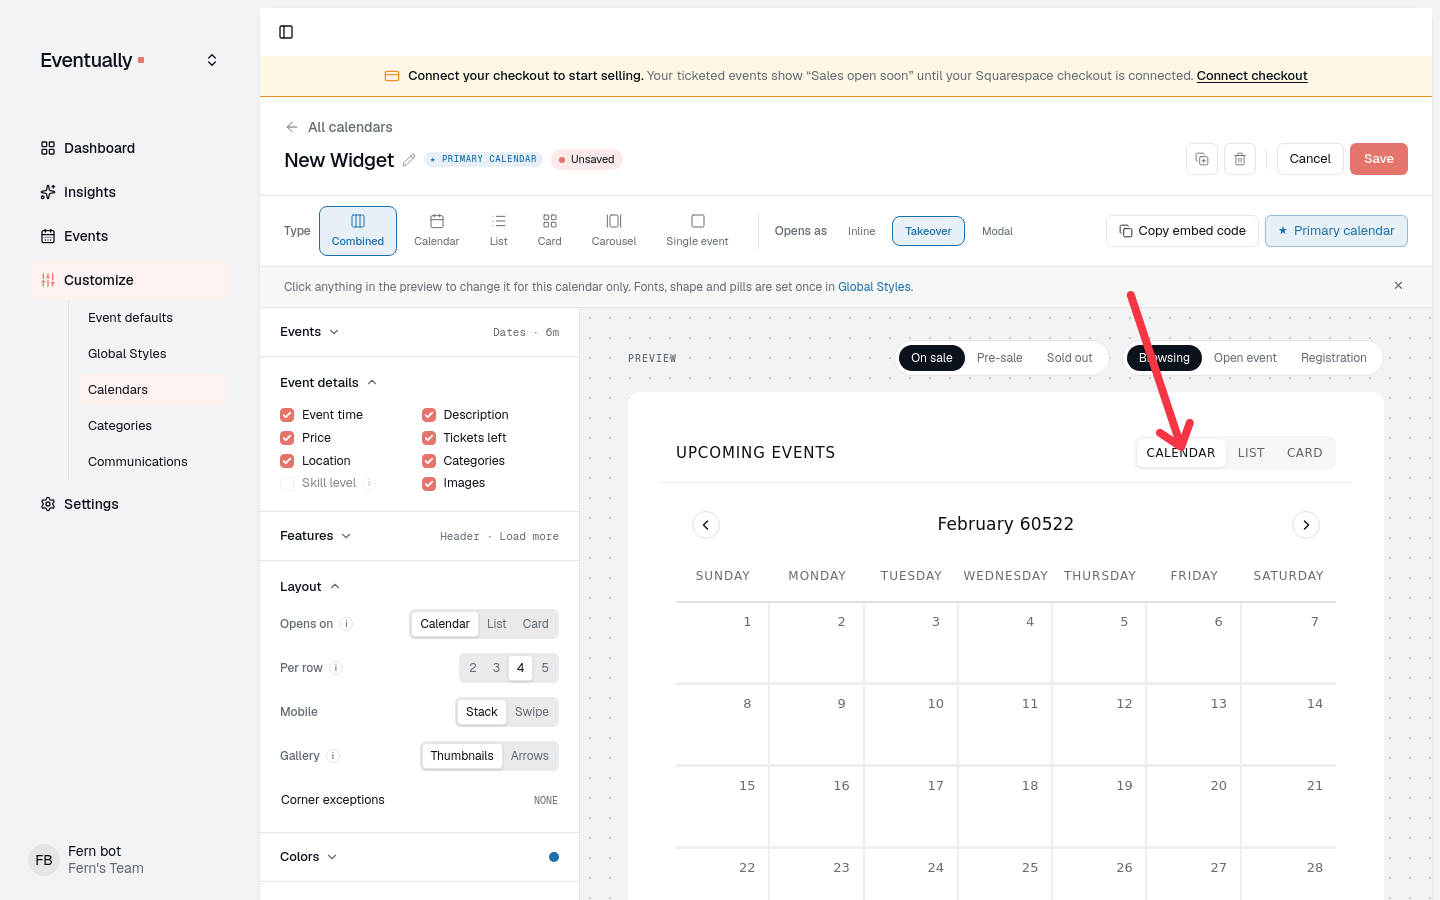
A Combined widget gives visitors a toggle between the Calendar, List, and Card views. The widget's opening-view control (Opens on in the current builder, Default View in the older one) sets the view visitors land on; Combined opens on Calendar unless you change it.
Carousel
The Carousel shows your events as a horizontal reel of image cards. Two Carousel-only controls appear when Carousel is selected:
Scroll: Click keeps the reel still until visitors scroll it, with arrows on desktop. Auto drifts the cards in one continuous two-minute loop, pauses while a visitor hovers over or focuses the carousel, and hides the arrows. Auto starts only when the carousel has more than two events, and visitors who prefer reduced motion get manual scrolling with arrows on non-touch devices instead.
Card content: Image only shows a square image with the date badge on it and nothing else. Title & info uses a wider image and adds the event time, title, skill level, price, and availability in a card body below it.
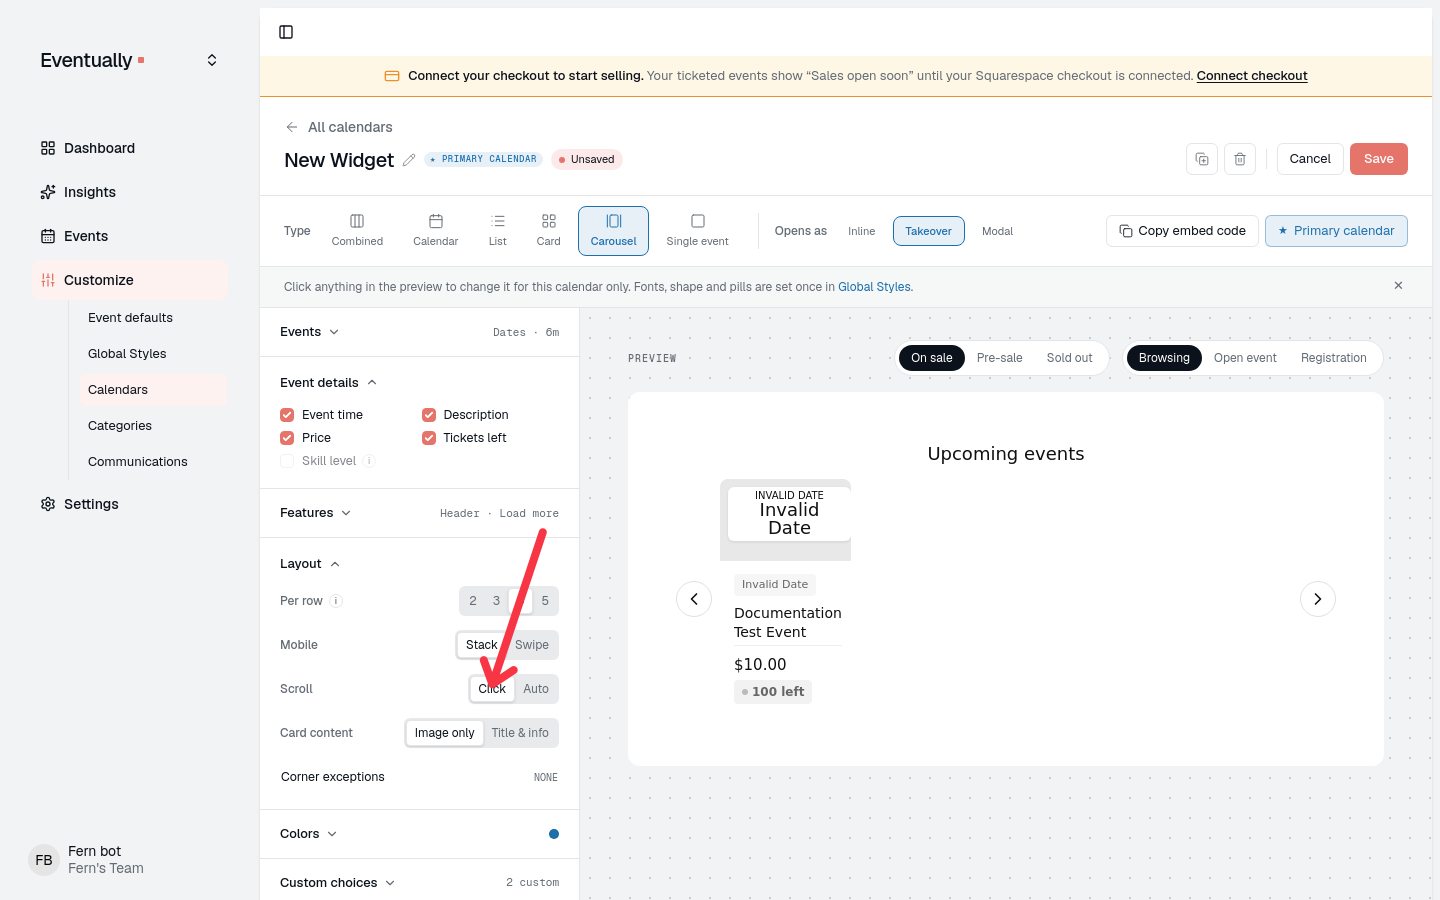
The Carousel follows your event filters: category and tag filters and Limit events by (a cap of 1 to 96 events, or a date range) still decide which events it shows. The Search bar, Sort and filter, and Starts on controls are not offered for Carousel. The per-row setting controls how many carousel cards fit across the widget, the card shadow applies, and carousel cards never show a border.
Mobile Card Layout
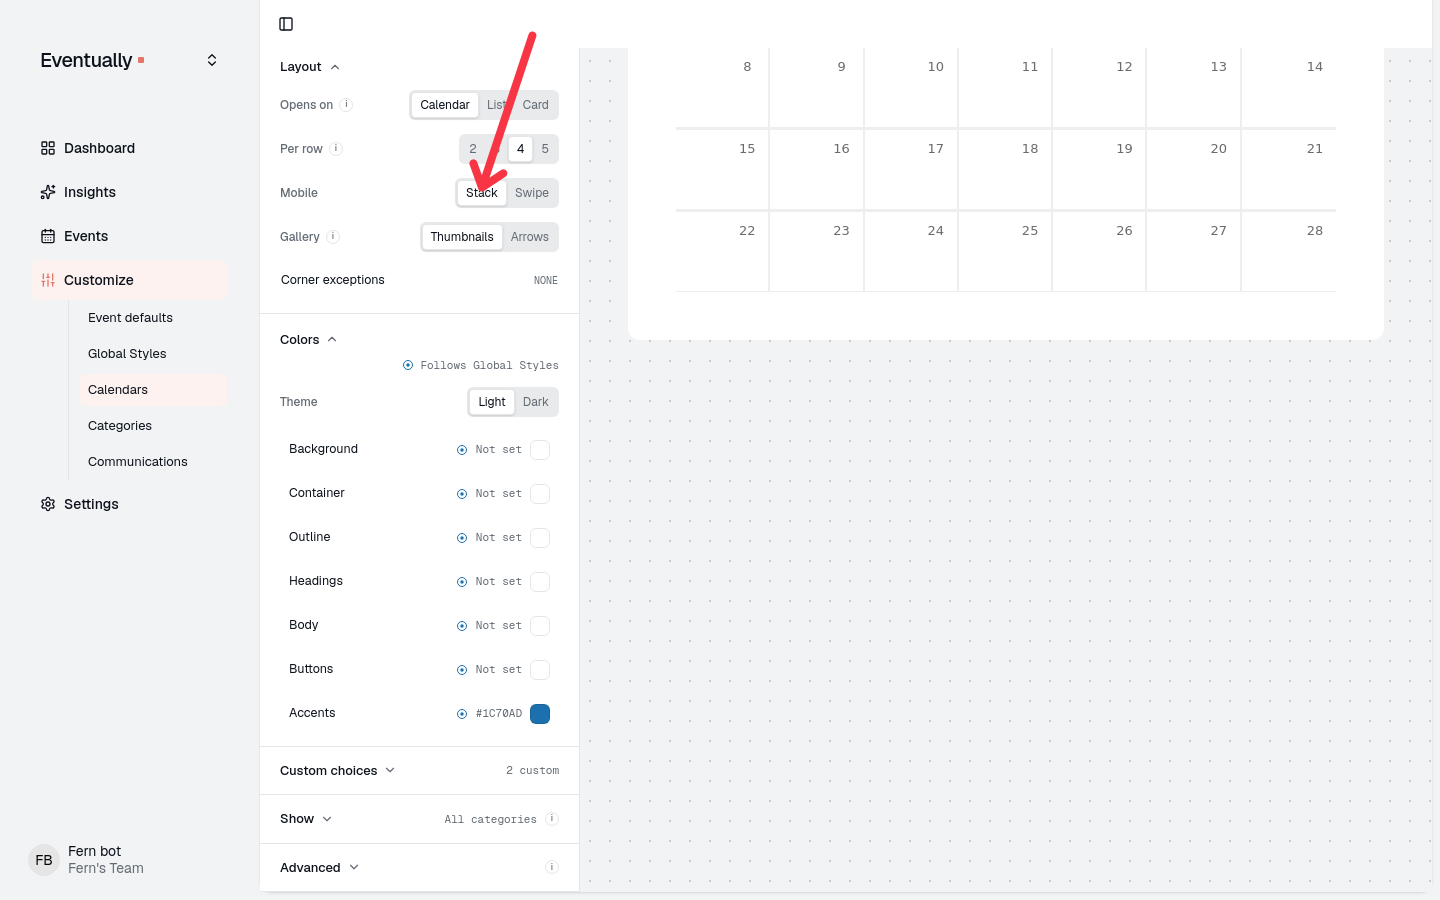
The Mobile control applies to the Card layout on phones. Stack piles the cards vertically under date headings, so visitors scroll down through them. Swipe lays the cards in a horizontal row: each card takes most of the screen width, visitors swipe between cards, and the next card peeks in at the edge.
Configure display settings
Use the Display tab to control how events appear in your widget.
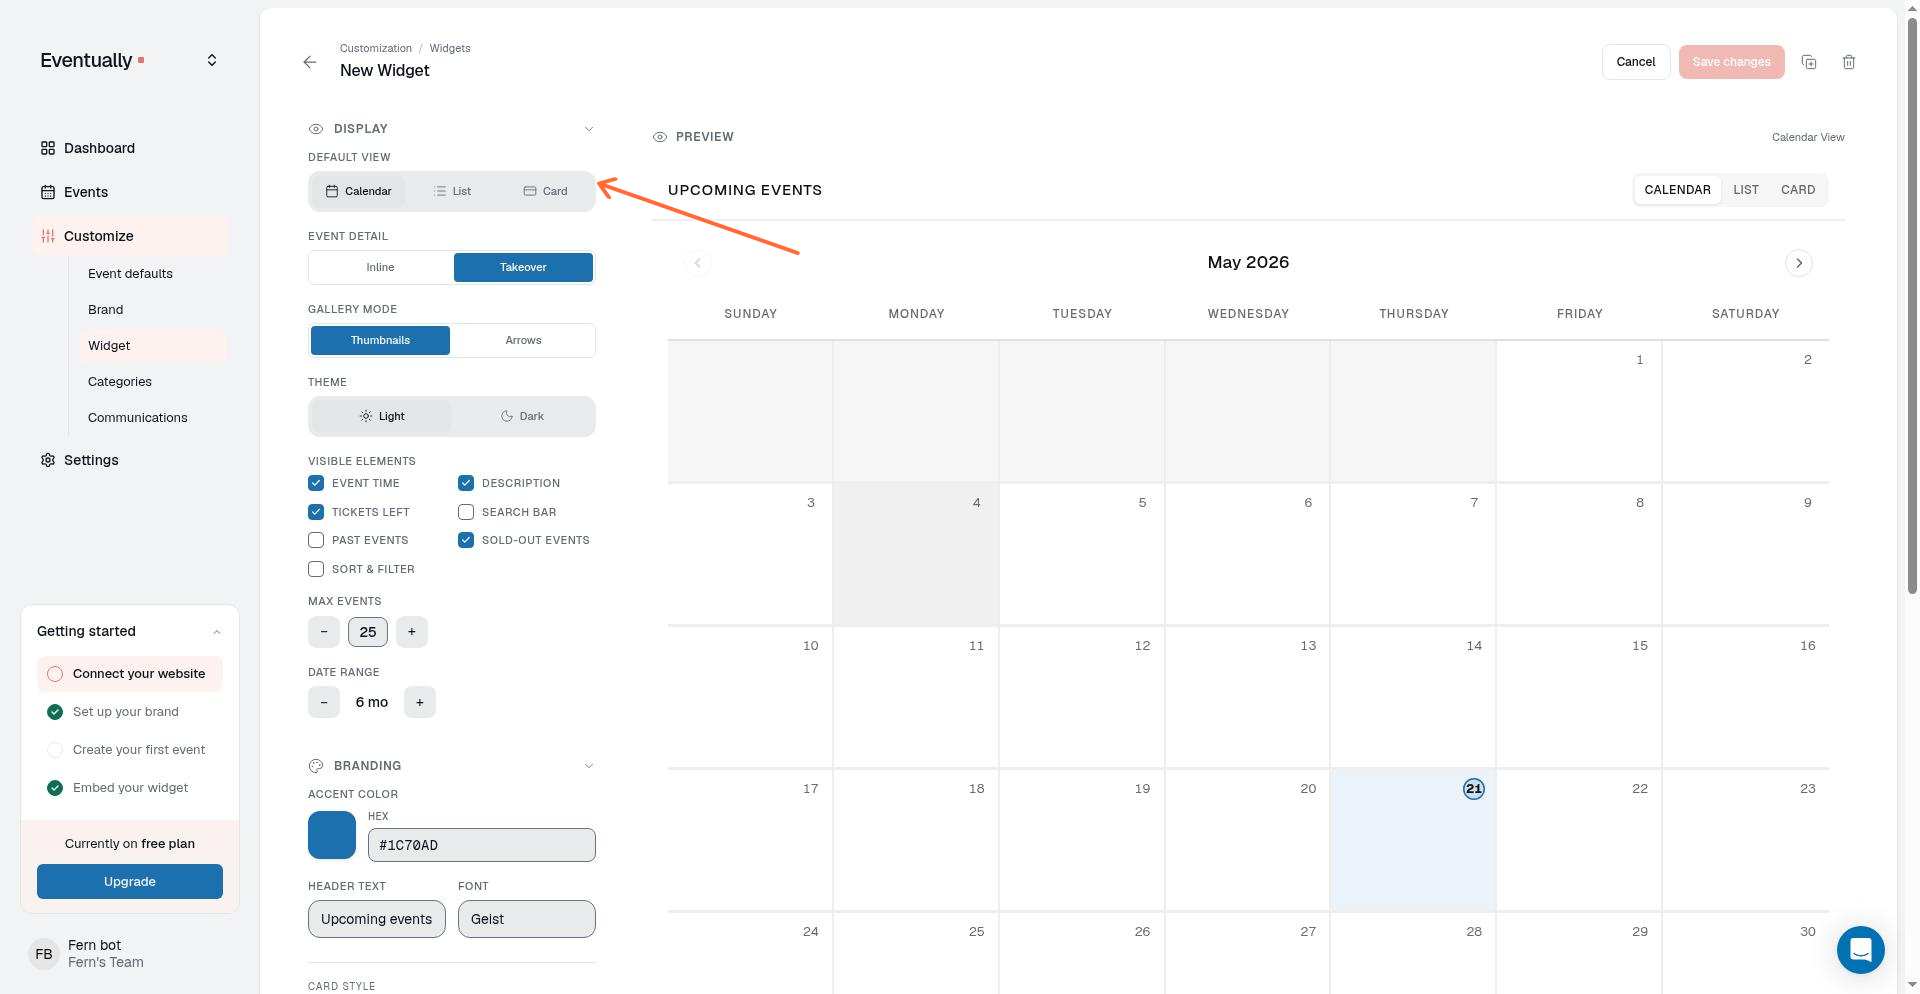
Default View
The Default View control offers Calendar, List, and Card. For a Combined widget, it sets the view visitors land on before they switch with the toggle. For a Calendar, List, or Card widget, the layout choice fixes the view, so this control does not change what visitors see. Single Event and Carousel do not use it.
Choose which month the calendar opens on
In Calendar view, including the Calendar view of a Combined widget, the widget opens on a starting month. Visitors can still move to other months afterward.
Use the Starts on control in the Events group to choose This month or First event. Until this calendar makes its own choice, it follows the team-wide Start calendar on first event setting on the Event defaults page; a choice here overrides the default for this calendar only.
With This month, the calendar opens on the current month. If the current month has no events, it opens on the month of the first upcoming event instead of showing an empty month. If there are no upcoming events, it stays on the current month.
The opening month is chosen from each widget's own included events after category and tag filters, so a filtered widget can open on a different month than an unfiltered one.
When Limit events by is set to Count, the calendar keeps opening on the current month and does not use the first-event month inference. This start-month behavior applies to Calendar view and is separate from Past events and from the Time frame date range.
The widget builder preview uses the same opening-month rules as the live embed.
Event detail options
Choose how event details appear when visitors click an event:
Inline: Opens details in place within the current view.
Takeover: Replaces the widget view with the full event page; the browsing view is hidden while it is open.
Modal: Opens a centered card over the dimmed widget.
When the widget is narrower than 600 pixels, Takeover and Modal open in a bottom sheet instead.
The control is labeled Opens as in the current widget builder and Event Detail in the older one. A Carousel widget saved with Takeover still opens event details as a Modal in the live embed.
Gallery Mode
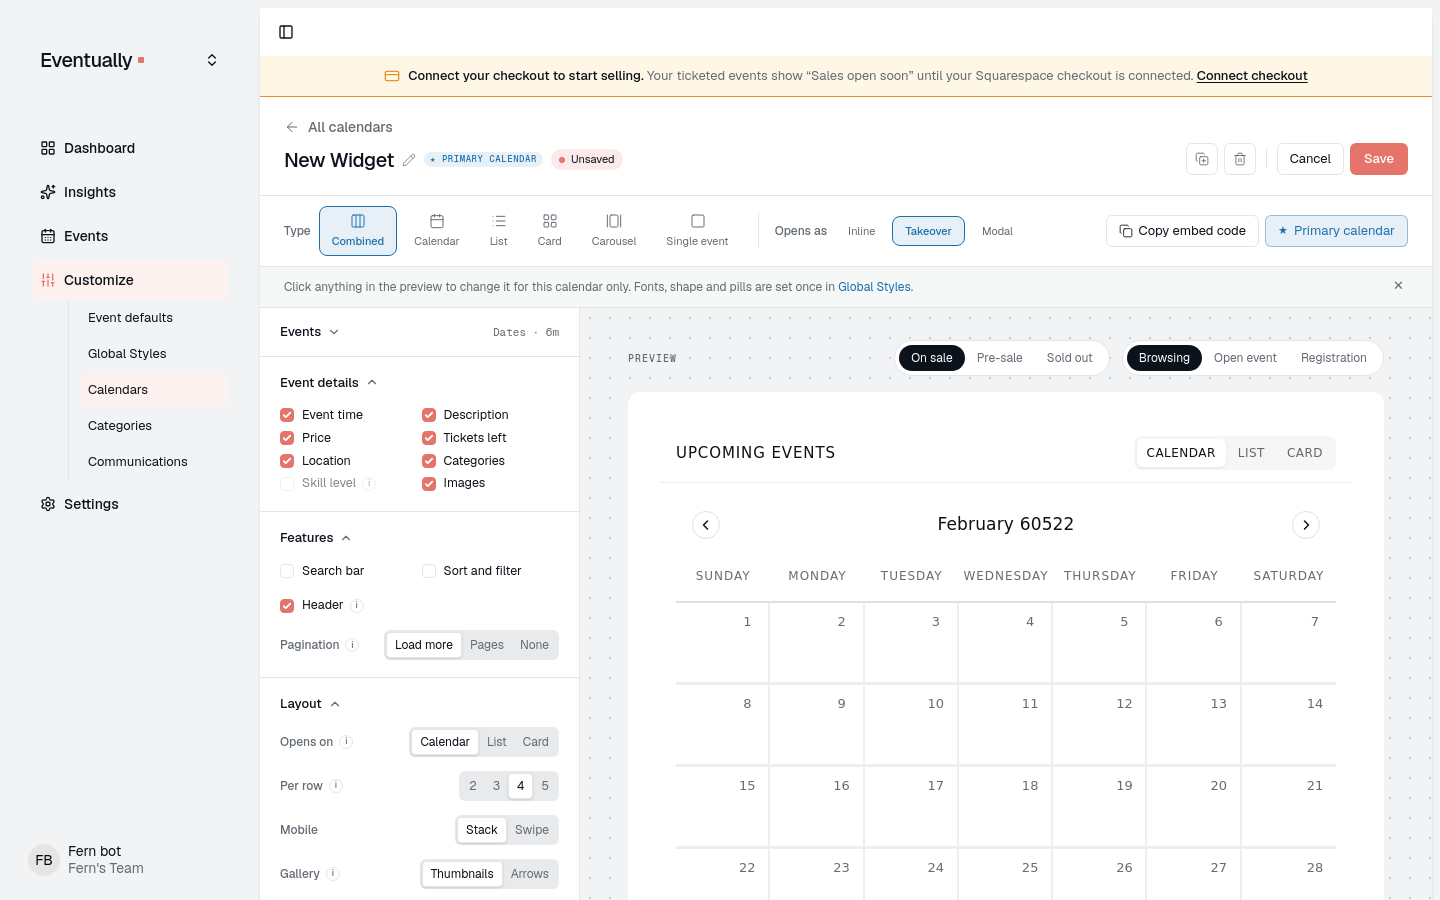
Choose how images display for events. This control appears when the event detail option is set to Takeover on layouts other than Carousel:
Thumbnails: Shows multiple images as small preview thumbnails below main image.
Arrows: Displays images in a carousel with navigation arrows.
To add and arrange images for your events, see Add multiple images to an event.
Choose what the calendar shows
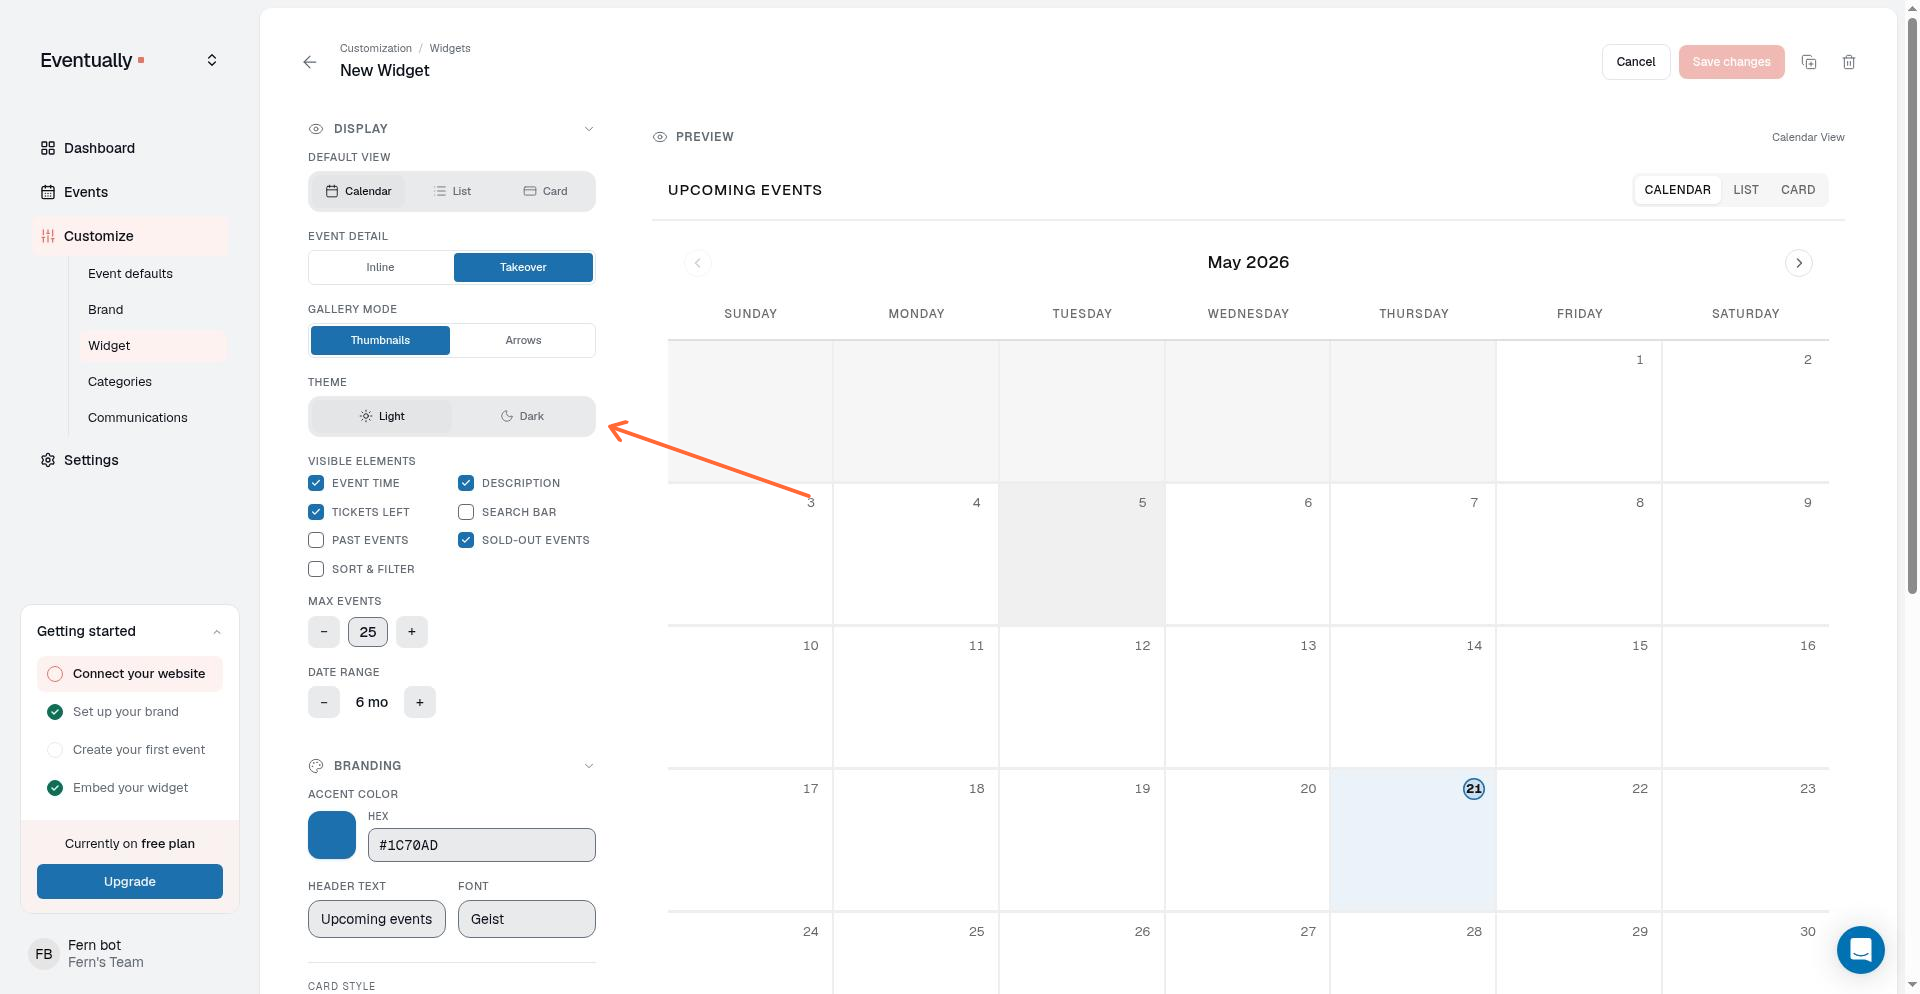
The calendar editor groups its display controls into Events, Event details, and Features. Turn each control on or off to choose what visitors see. Choices this calendar makes on its own appear as clearable chips under Custom choices, and a choice that matches the shared styles clears itself when you save the calendar.
Events
These controls decide which events appear: Sold out, Pre-sale, Past events, Day photos, Limit events by, Time frame, and Starts on. Limit events by caps the number of events shown, and Time frame limits them to a date range.
Event details
Choose which details appear on the events visitors browse: Event time, Description, Price, Tickets left, Location, Categories, Skill level, and Images. Each row appears only for calendar types that draw that detail, and a row is greyed out with an explanation when the data behind it is missing, such as Skill level with no saved scale or Categories with no categories.
Price, Location, Categories, Skill level, and Images hide from the cards and rows visitors browse only. The opened event, checkout, and the hosted /e/ event page still show those details, and the carousel keeps its images.
On single-event calendars, these choices apply to the resting card. After someone registers, location and price can appear in the registration panel header.
When Price is hidden, Sort and filter does not offer price brackets.
You can also hide remaining-ticket counts site-wide with Hide tickets remaining in Customize → Event Defaults. When that setting is on, the Tickets left control here is disabled and the site-wide setting applies instead.
Features
Turn the widget's tools on or off: Search bar, Sort and filter, Header, and Pagination.
Keyboard and screen reader support
The embedded widget supports keyboard and screen reader browsing for event chips, search, Sort and Filter menus, and the event details overlay. Event chips announce their full calendar date, the search field is named Search events, Sort and Filter keep arrow-key focus inside the open menu, and the details step uses the Event details navigation landmark.
For the full visitor-facing behavior, see Keyboard and screen reader support for the calendar widget.
Customize branding
Use the Branding tab to adjust visual styling including accent color and header text.
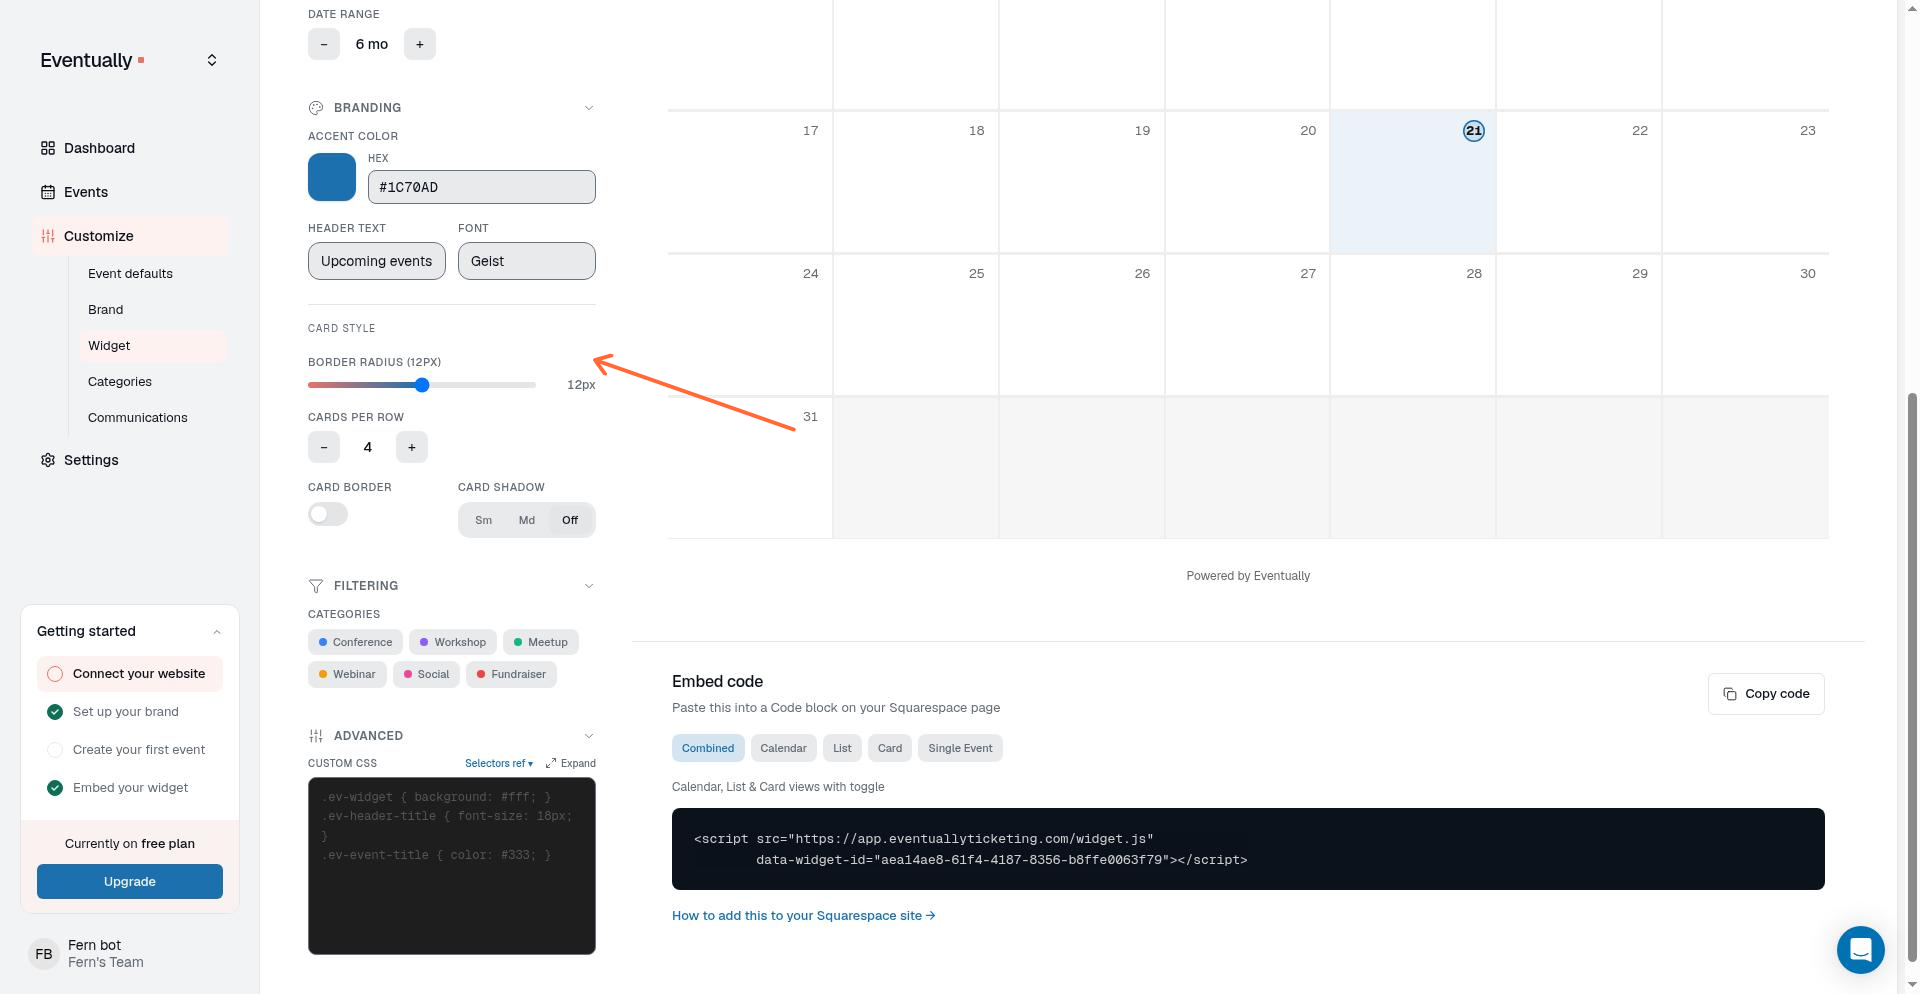
Border Radius
Control the corner rounding on calendar cards. Adjust the slider to soften or sharpen the widget's appearance. The value displays in pixels (e.g., "12px").
Pre-sale banner
The Pre-sale banner control appears in the Card Style area of the Branding tab only when your team has pre-sales enabled. Choose between two layouts:
Split: The default. Places the message and the on-sale gate side by side at widths of 820px or more, and stacks them below that width.
Centered: Always stacks the message above a full-width on-sale rail and centers the message content.
Add custom CSS
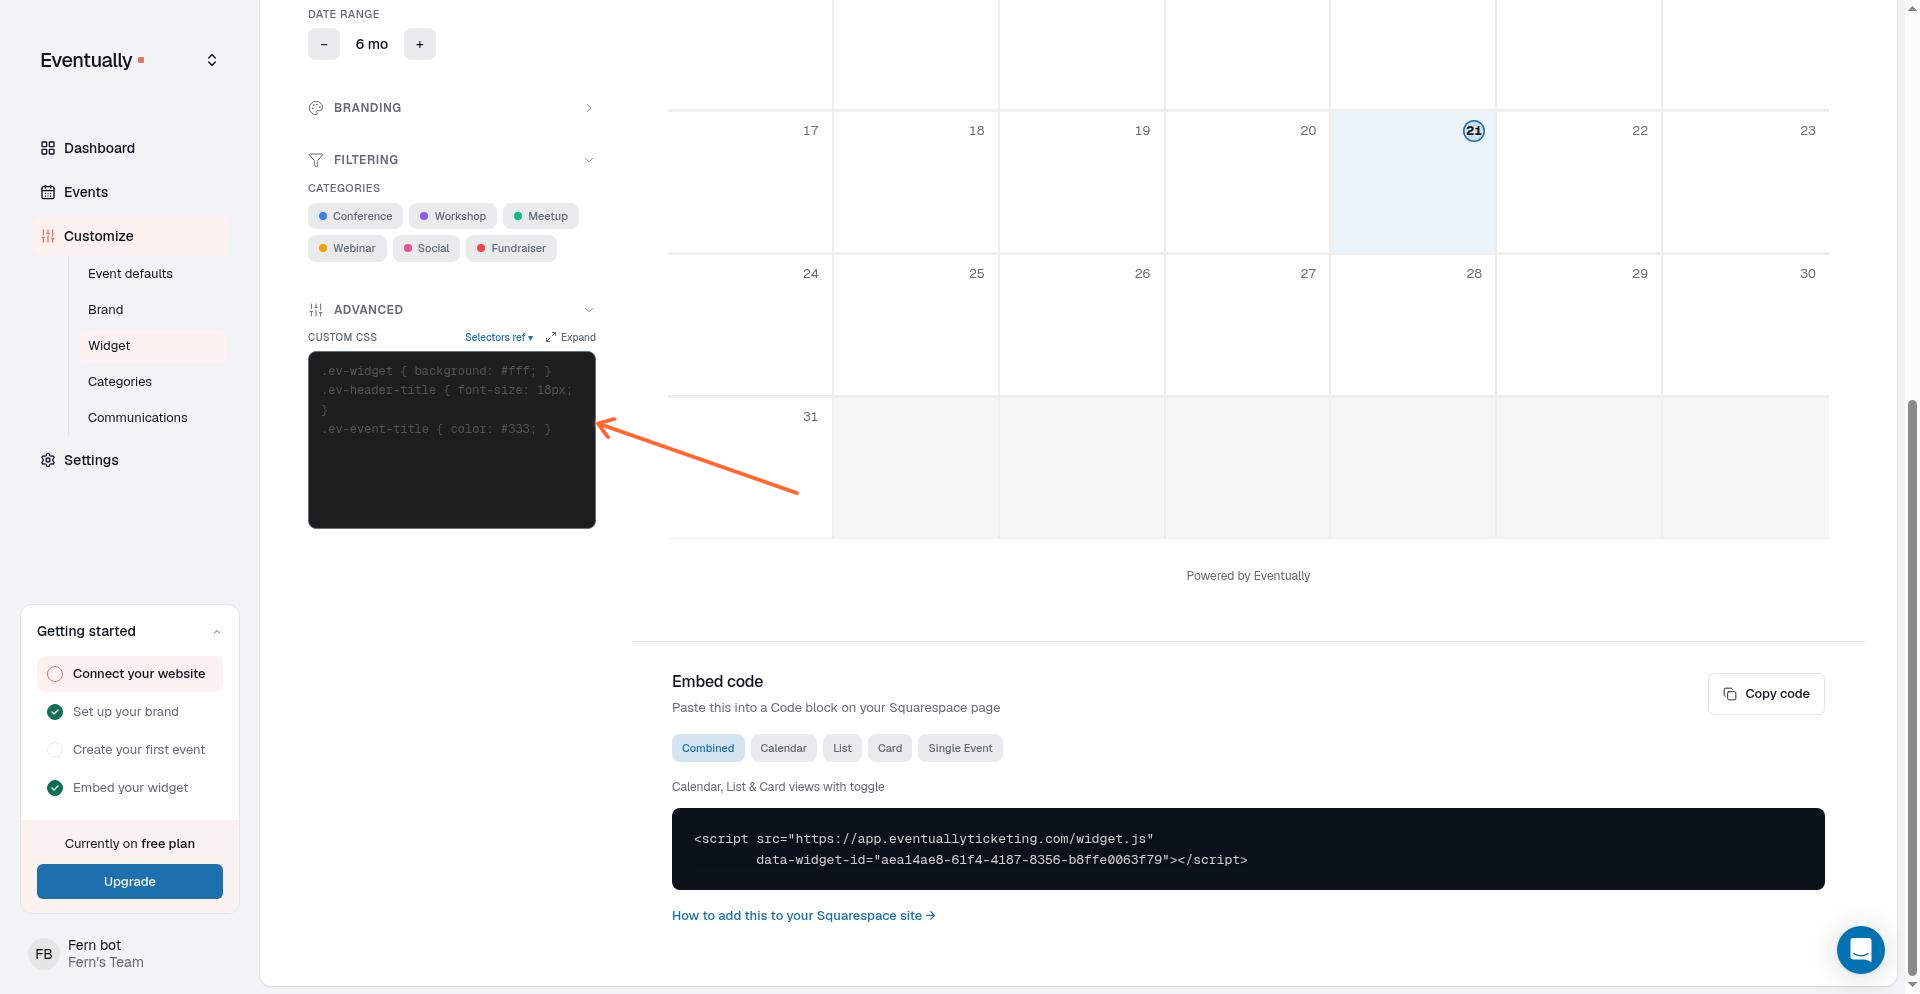
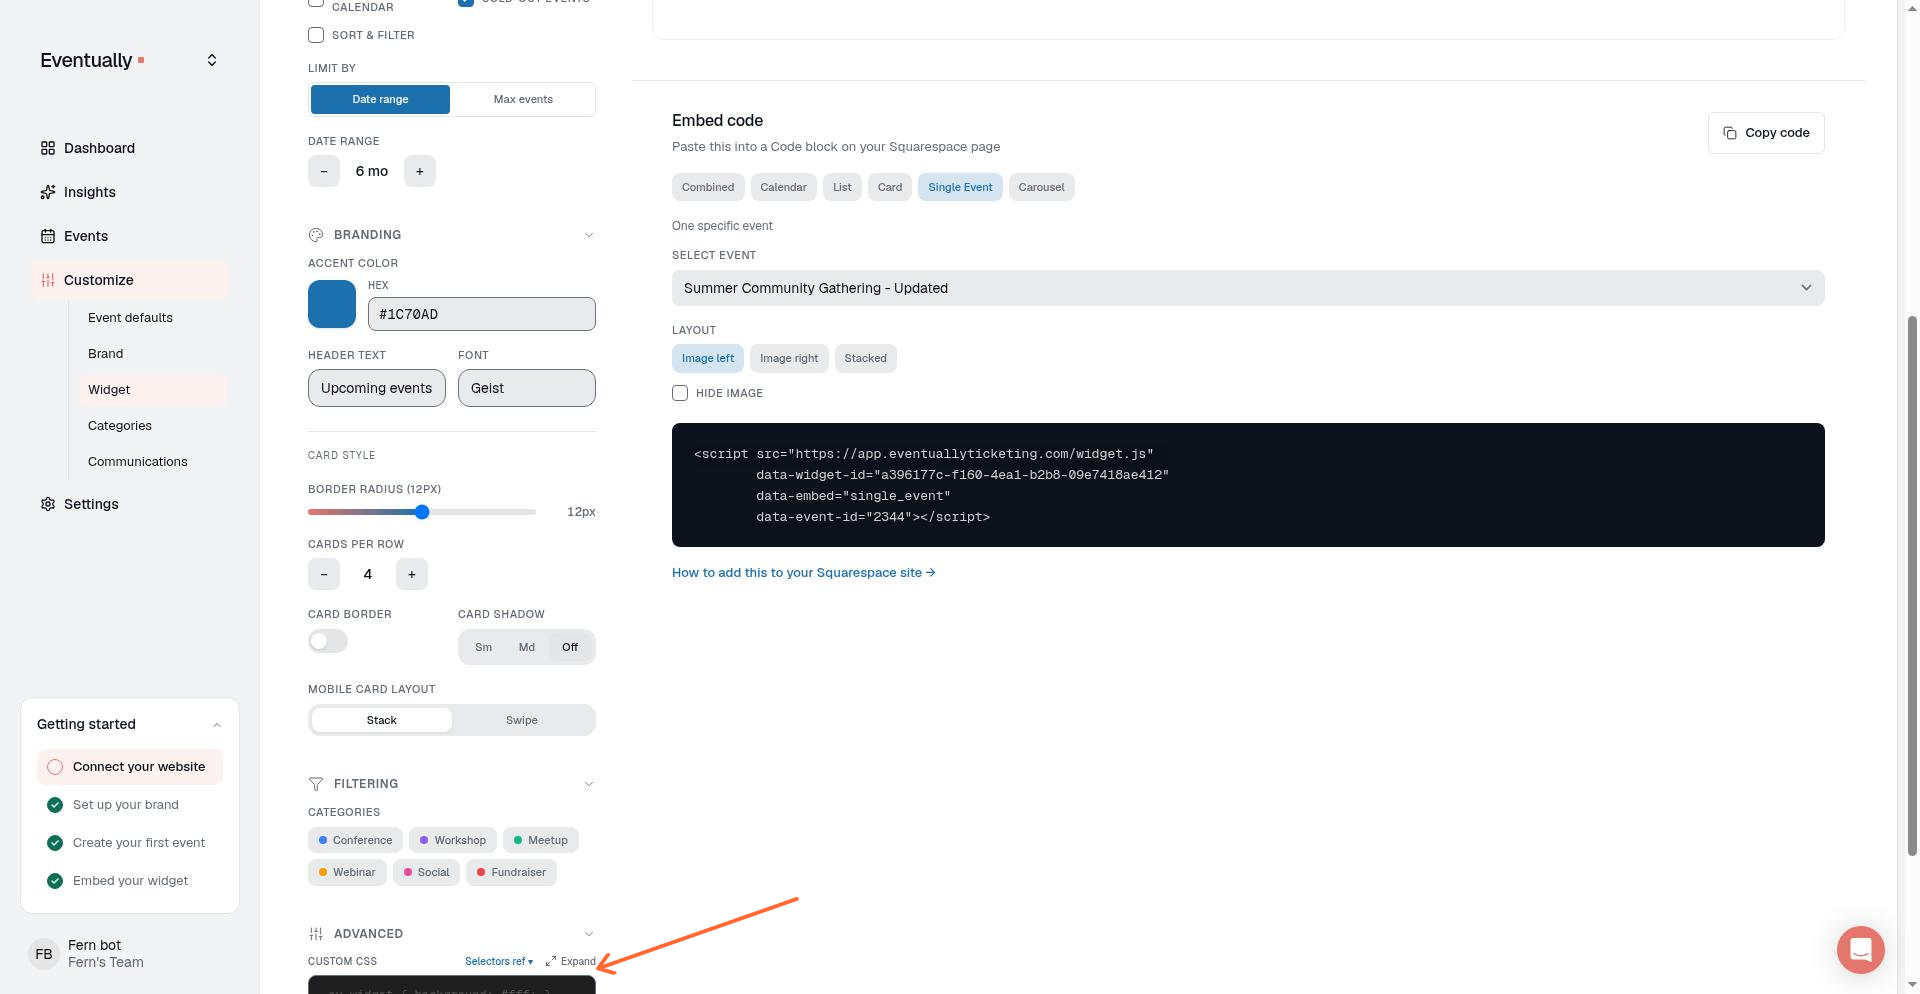
For advanced styling, use the Advanced section of the calendar editor to enter custom CSS. Your styles apply directly to the embedded widget and override defaults. Custom CSS also styles the hosted event page when that calendar is designated as the event-page style; otherwise it applies only to the embed.
Custom CSS is limited to 64 KB (65,536 bytes), measured on the text you paste rather than the rendered result. If your CSS exceeds the limit, saving is rejected rather than truncated, and the message shows the measured size and how many bytes to remove. Custom CSS also follows an allowlist: rules must stay within the widget scope, only the at-rules @media, @supports, @keyframes, and @font-face are supported, each CSS string can declare at most 12 @font-face blocks, and font sources must use approved hosts. Unsupported content is omitted from the widget, hosted event pages, and previews. For the supported styling hooks, see Widget CSS selector reference.
Hide calendar background images
To remove the featured-event background images that fill day cells in the month grid, add this to the Advanced section:
.ev-day-image {
  background-image: none !important;
}
Save the widget to apply the change to every embedded instance automatically.
Filter events
Use the Show group to control which events appear in the widget. You can limit the widget by category, by tag, or both, so each page shows only the events you want.
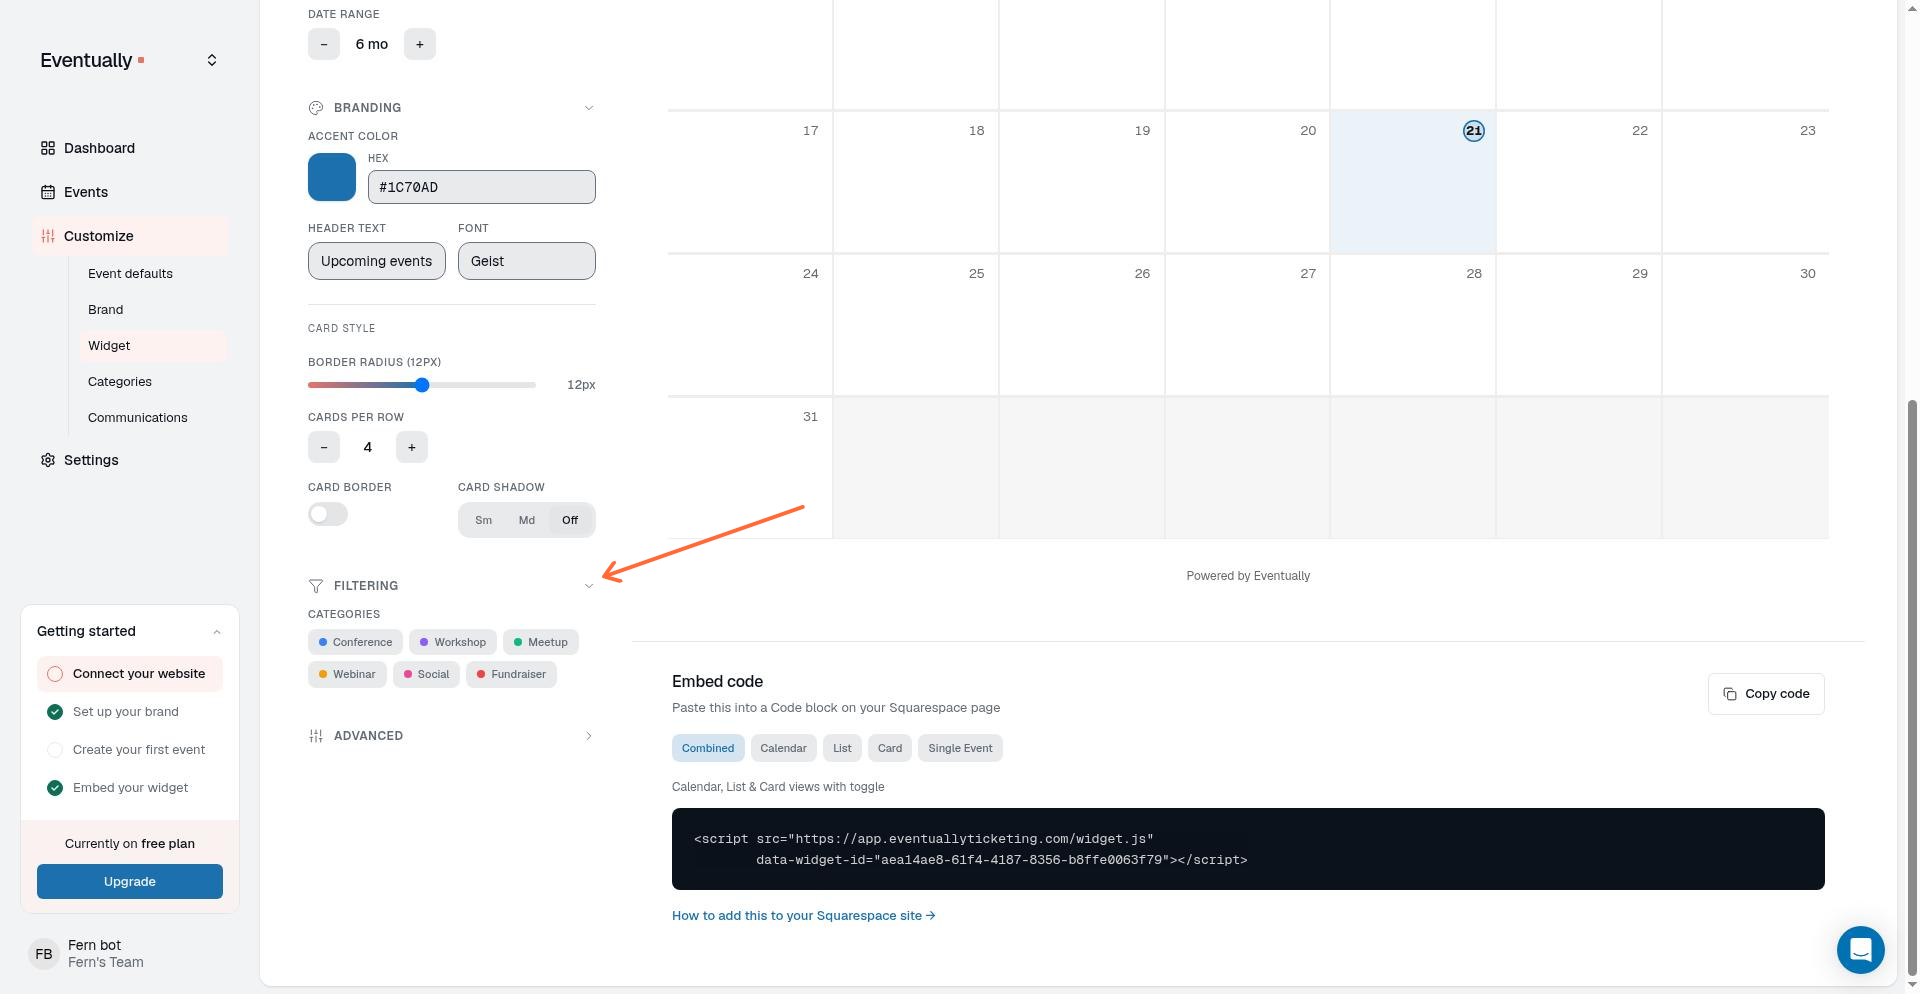
Filter by category
Under Categories, select one or more category chips. The widget includes events that match any selected category. Click Clear filter under Categories to remove the category filter.
Filter by tag
If your team has tags, a Tags chip picker appears under Show. Select one or more tags to include only events that have at least one of those tags. The widget preview updates as soon as you select or clear a tag. Click Clear filter under Tags to remove the tag filter.
The Tags picker is hidden when your team has no tags. Create and assign tags from Manage tags for your events before you can filter a widget by tag.
Tag names are not shown to visitors in the widget. Filtering only changes which events appear; categories remain the visitor-facing labels. See Customize event categories.
Combine category and tag filters
Within Categories, an event matches if it has any of the selected categories. Within Tags, an event matches if it has any of the selected tags. When both filters have selections, an event must match the category filter and the tag filter.
Leave a filter empty, or never set a tag filter, to keep that facet unfiltered. Existing widgets without a tag selection keep their previous event set until you choose tags and click Save changes.
Saved filters apply automatically to every place the widget is embedded. You do not need to re-copy the embed code.
Skill levels for guests
When your team has saved a skill level scale, the widget shows the skill level for each event to guests and lets them filter by it. Without a saved scale, no skill-level display or filter appears.
On-scale levels appear as a strength meter on single-event views, registration modals, and hosted event pages. Numeric scales show a value such as 3 / 5; custom scales show the configured level label. Widget list rows show a compact filled-dot scale on desktop and mobile. Levels marked Not a rank, such as All levels, appear as plain text, and missing or unresolved levels show no skill-level treatment.
The widget filter menu shows a section named after your configured scale and lets guests filter the event list by its levels, including off-scale points.
Preview your widget
The Live Preview now simulates the full customer journey through your widget. Use it to walk through a realistic demo of browsing events, choosing tickets, and completing registration before you embed or share the widget.
Open the preview to start the interactive demo.
Move through the three stages:
Browse: Explore upcoming events. Use the Cards, List, or Calendar view toggle to see how your events appear in each layout.
Tickets: Select tickets and adjust quantities, then click Continue to attendee details to move forward.
Register: Enter attendee details such as First name, Last name, Email, and any custom fields you have configured. This shows exactly what your registrants will see.
Click Adjust to open the Adjust your preview modal. Update your inputs and click Rebuild → to regenerate the preview with new settings. If the preview failed to build, click Try again to regenerate it.
Regenerating a preview requires completing the verification widget first, whether you use Adjust → Rebuild or Try again. Each preview can be regenerated up to five times per hour. This limit applies to the preview itself and is separate from your event capacity or ticket limits. Once a preview has been claimed, it cannot be rebuilt; continue from the claimed preview instead of regenerating it.
The preview is a live-looking demo, not a published event. It uses sample data to represent your branding, layout, and registration flow so you can confirm the experience before going live.
Embed the widget on Squarespace
Open the calendar in Customize → Calendars.
Click Copy embed code at the top of the calendar editor. In the older widget builder, click Copy code in the Embed code section.
Open your Squarespace page editor.
Add a Code block where you want the calendar to appear.
Paste the embed code into the code block.
Save and publish your page.
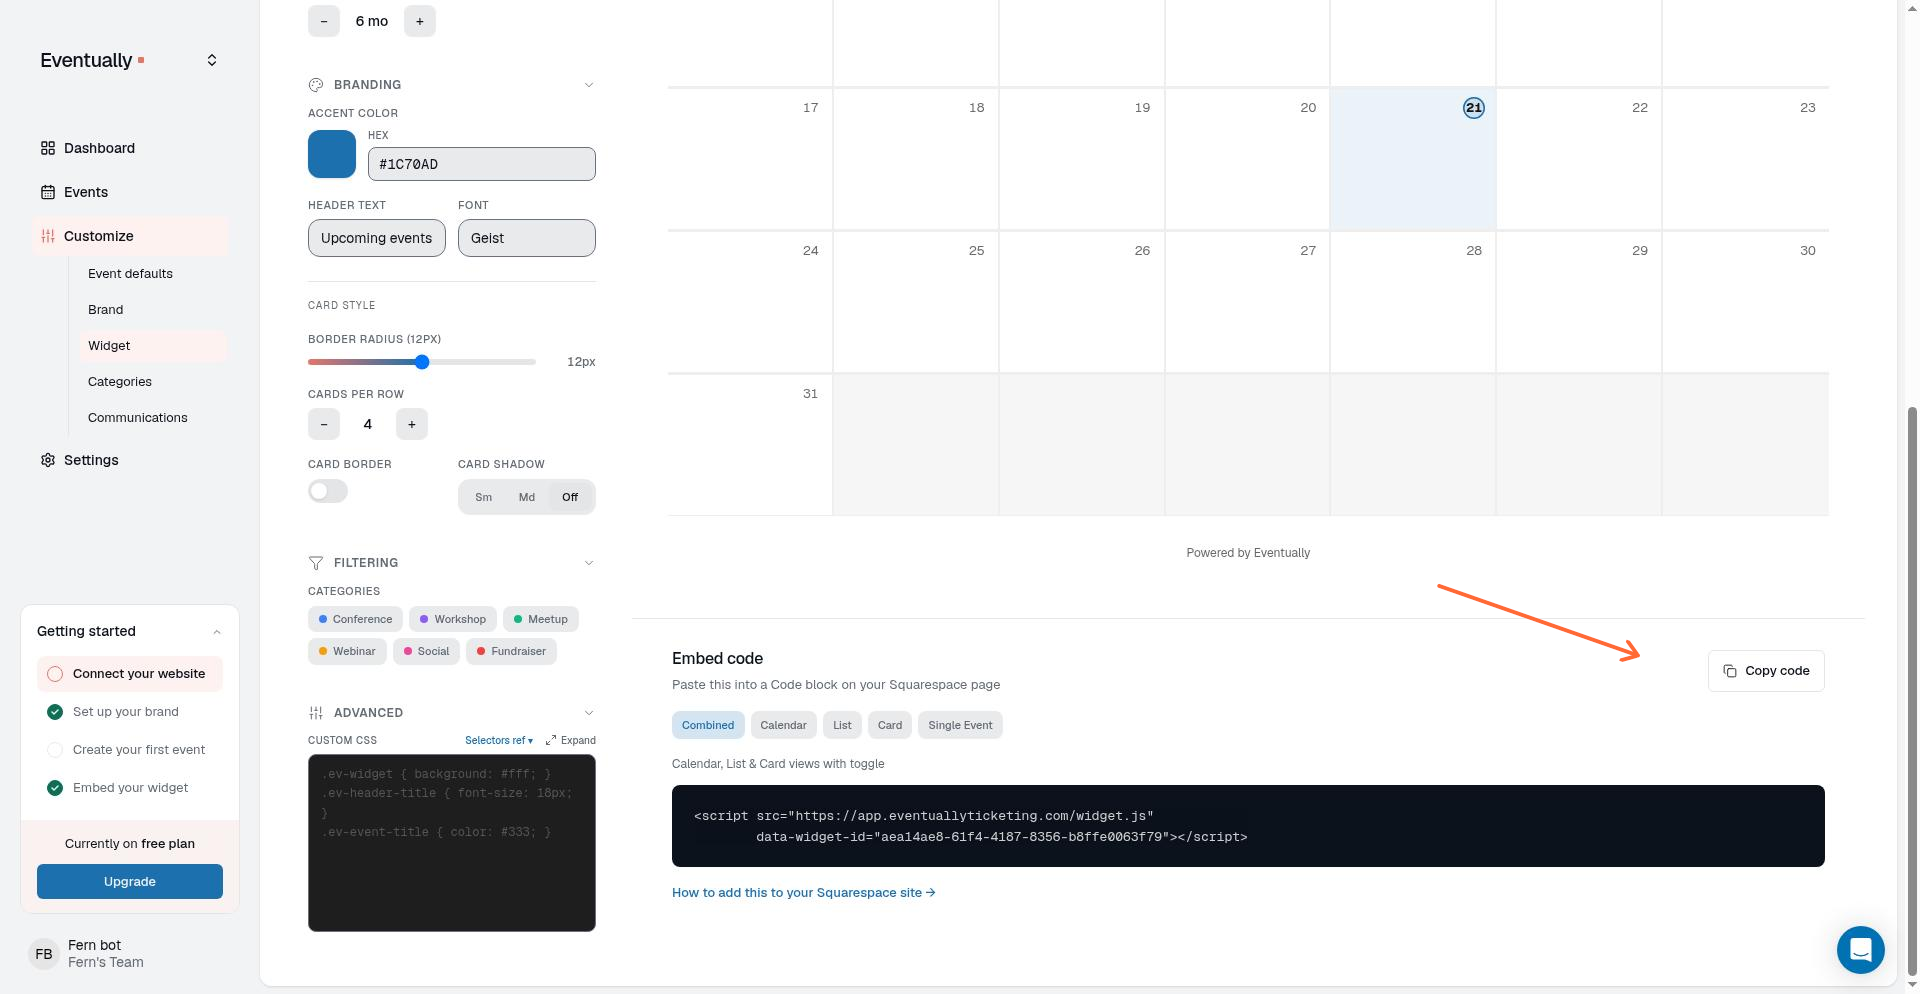
The widget matches your Squarespace theme automatically. Visitors browse events and complete checkout without leaving your site.
Organize widgets with folders
Create multiple widgets with different settings for different pages, then group them into folders on the Calendars page to keep them organized.
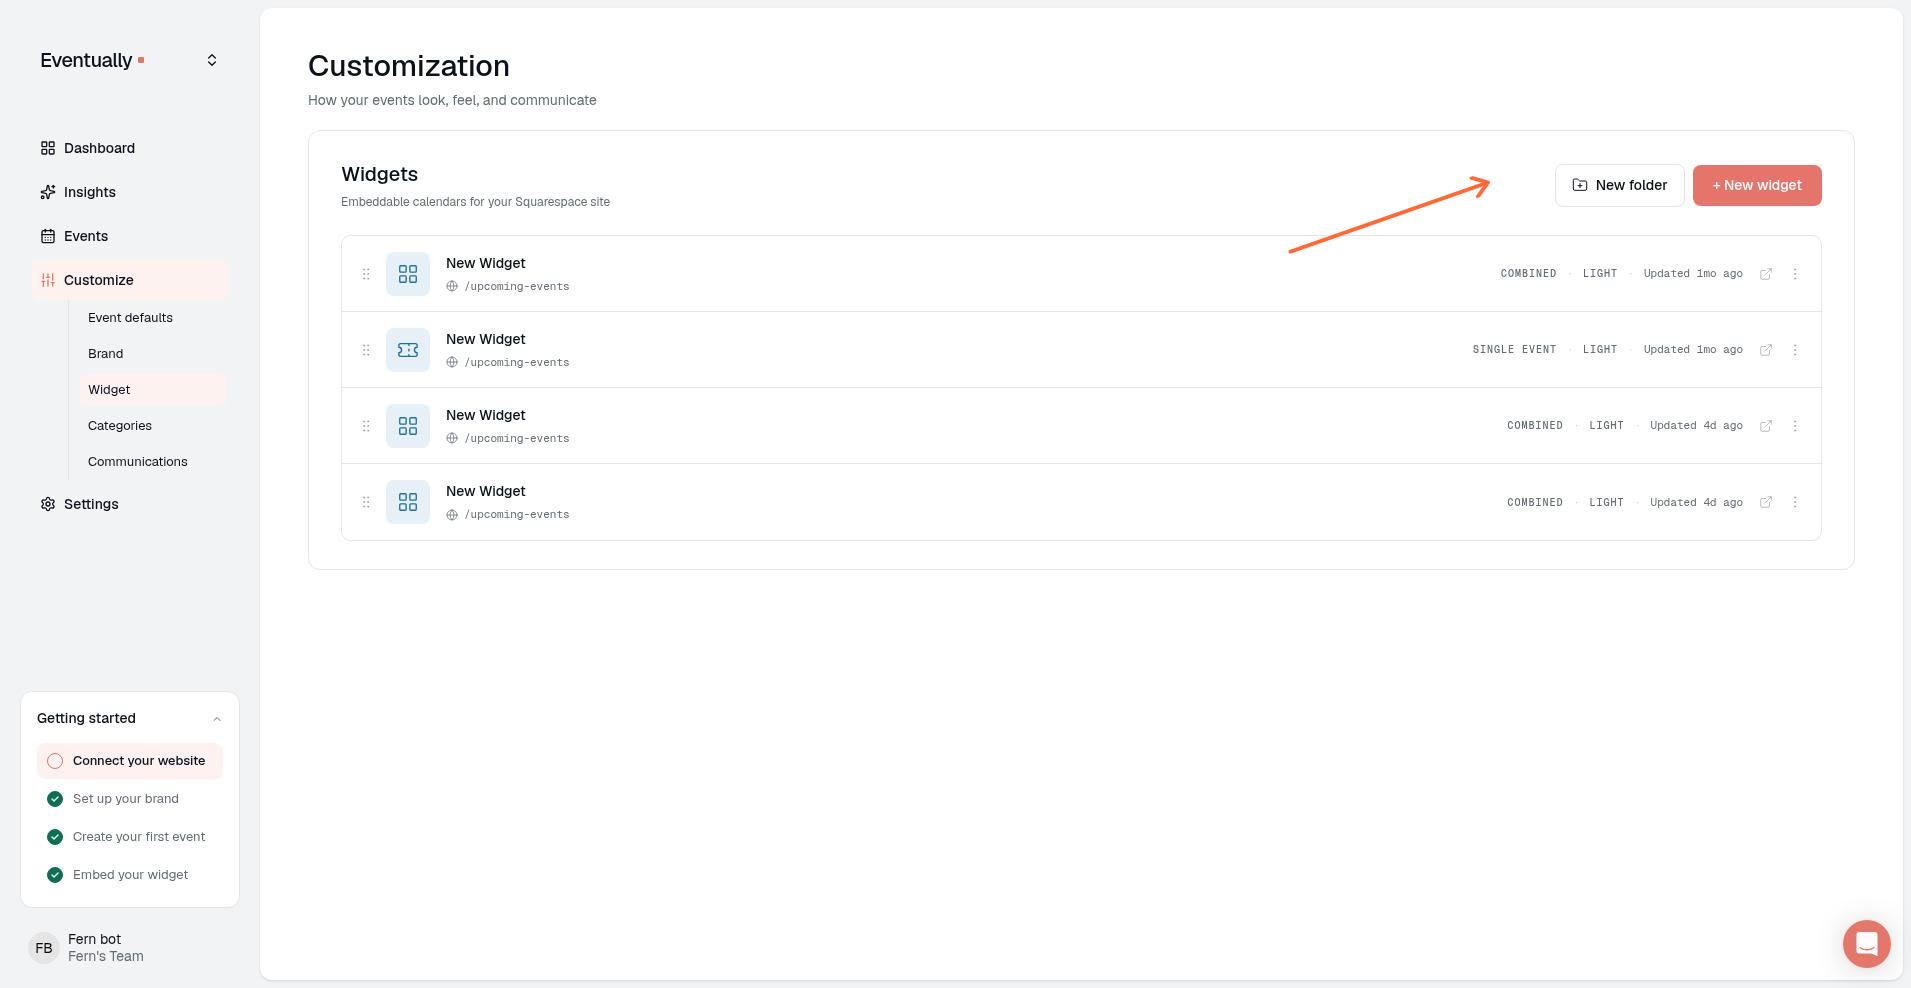
Go to Customize → Calendars.
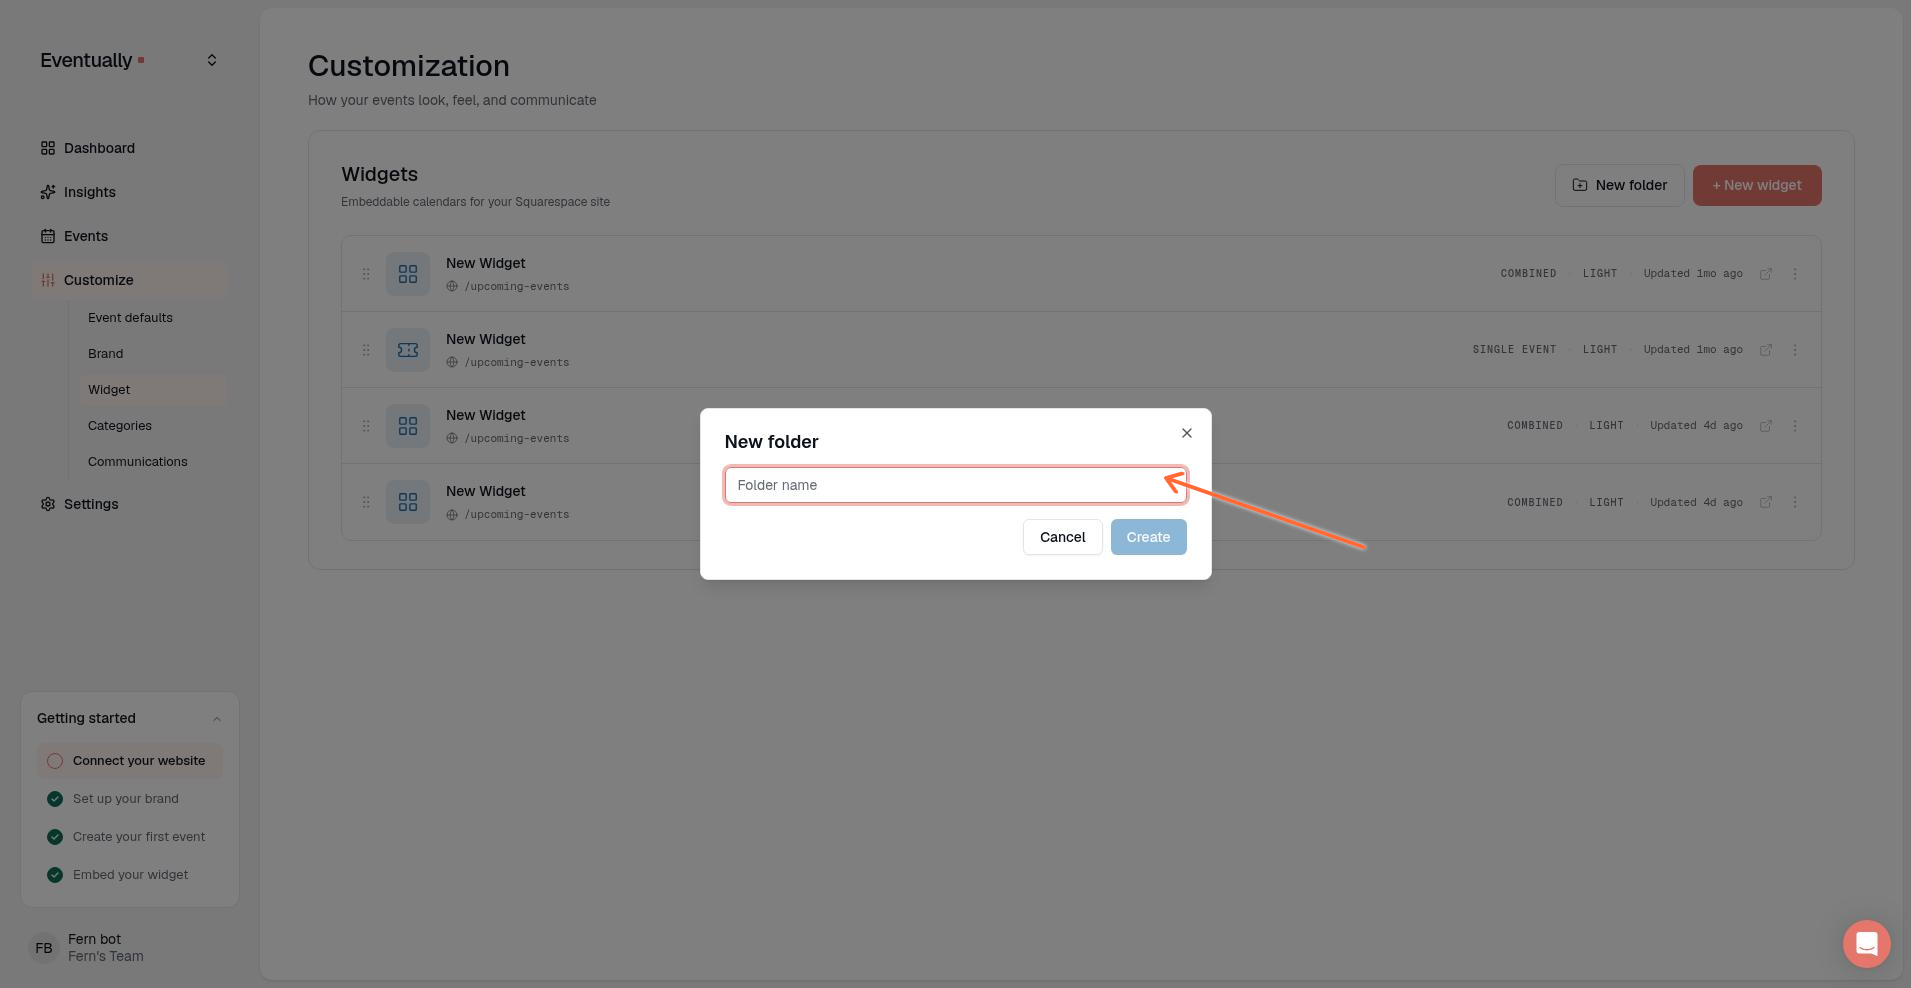
Click New folder, enter a name, and click Create.
Drag widgets into a folder, or drag them within a folder or the Ungrouped band to reorder.
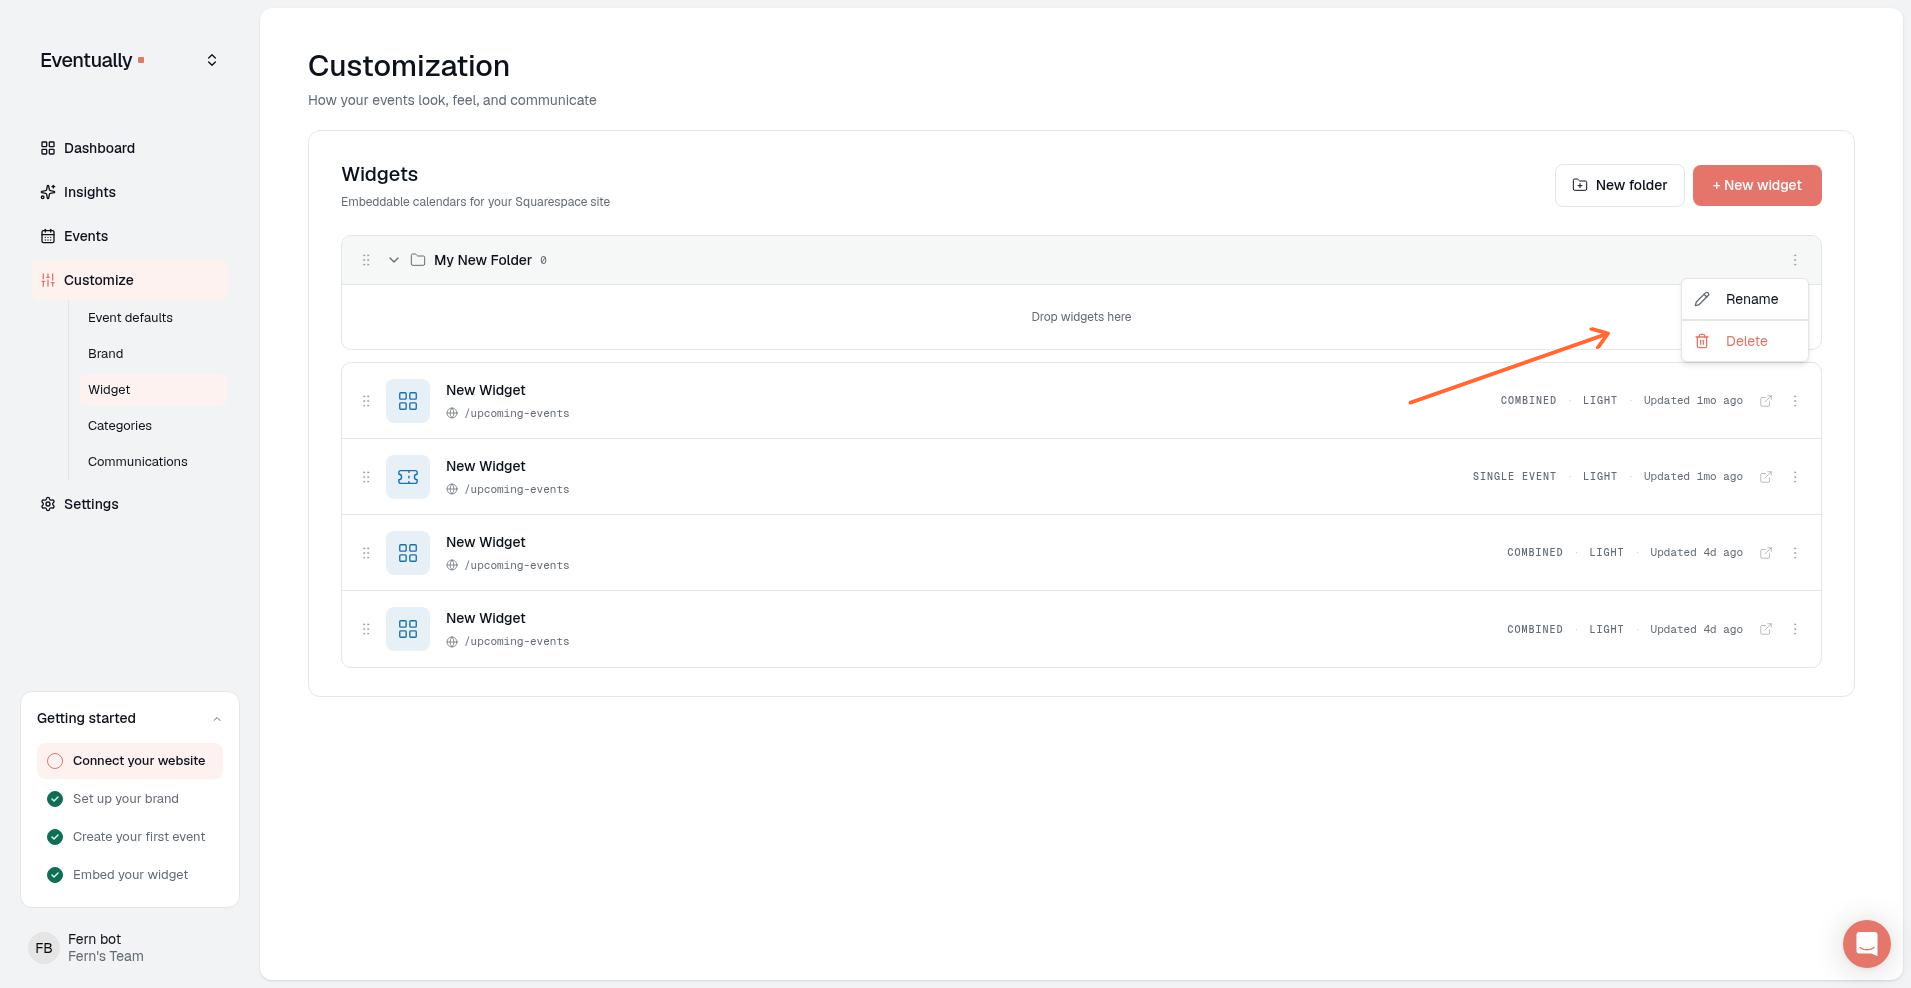
To rename or delete a folder, open the more-options menu next to the folder name and choose Rename or Delete.
Deleting a folder does not delete the widgets inside it. They return to the Ungrouped band.
The same embed code displays the same widget everywhere. If you want different content in different places (for example, showing only workshops on one page and private events on another), create a separate widget for each instance with its own filters.
Update an embedded widget
Changes in the Eventually dashboard appear automatically in your embedded widget. You don't need to re-copy the embed code: save your changes in the widget builder.
Single-event embed layouts
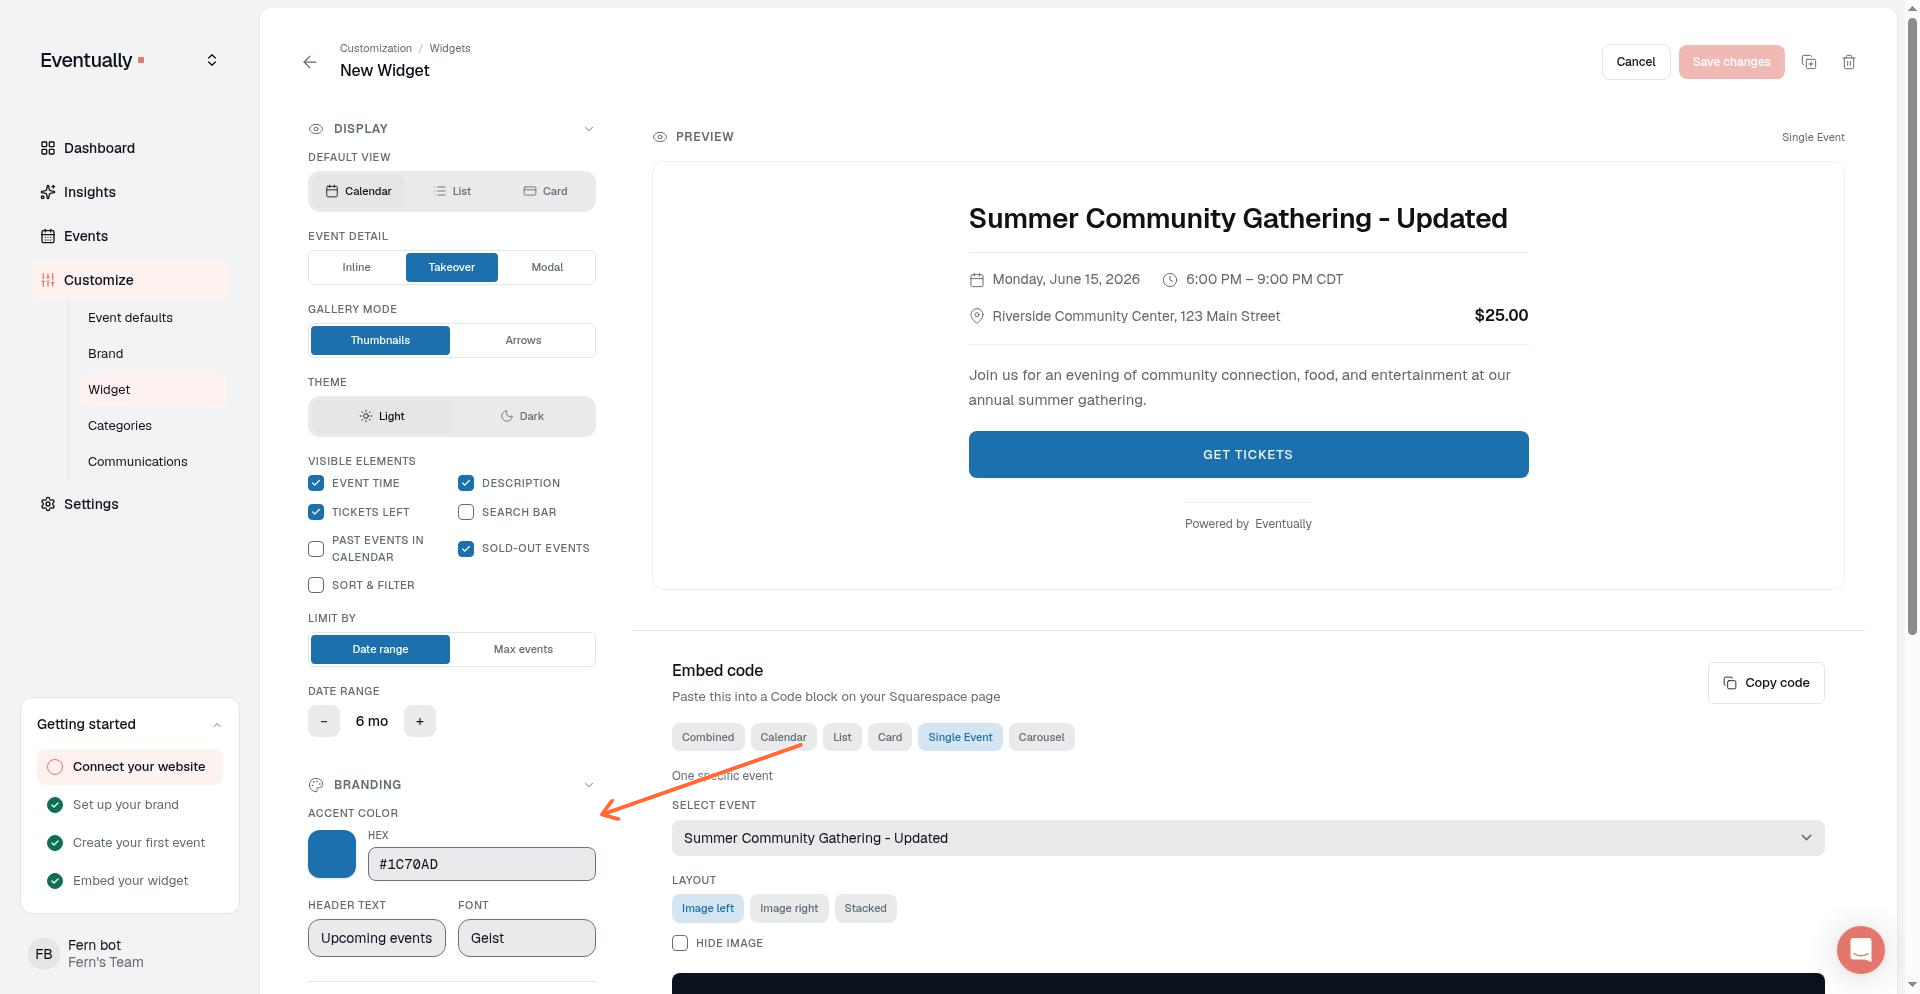
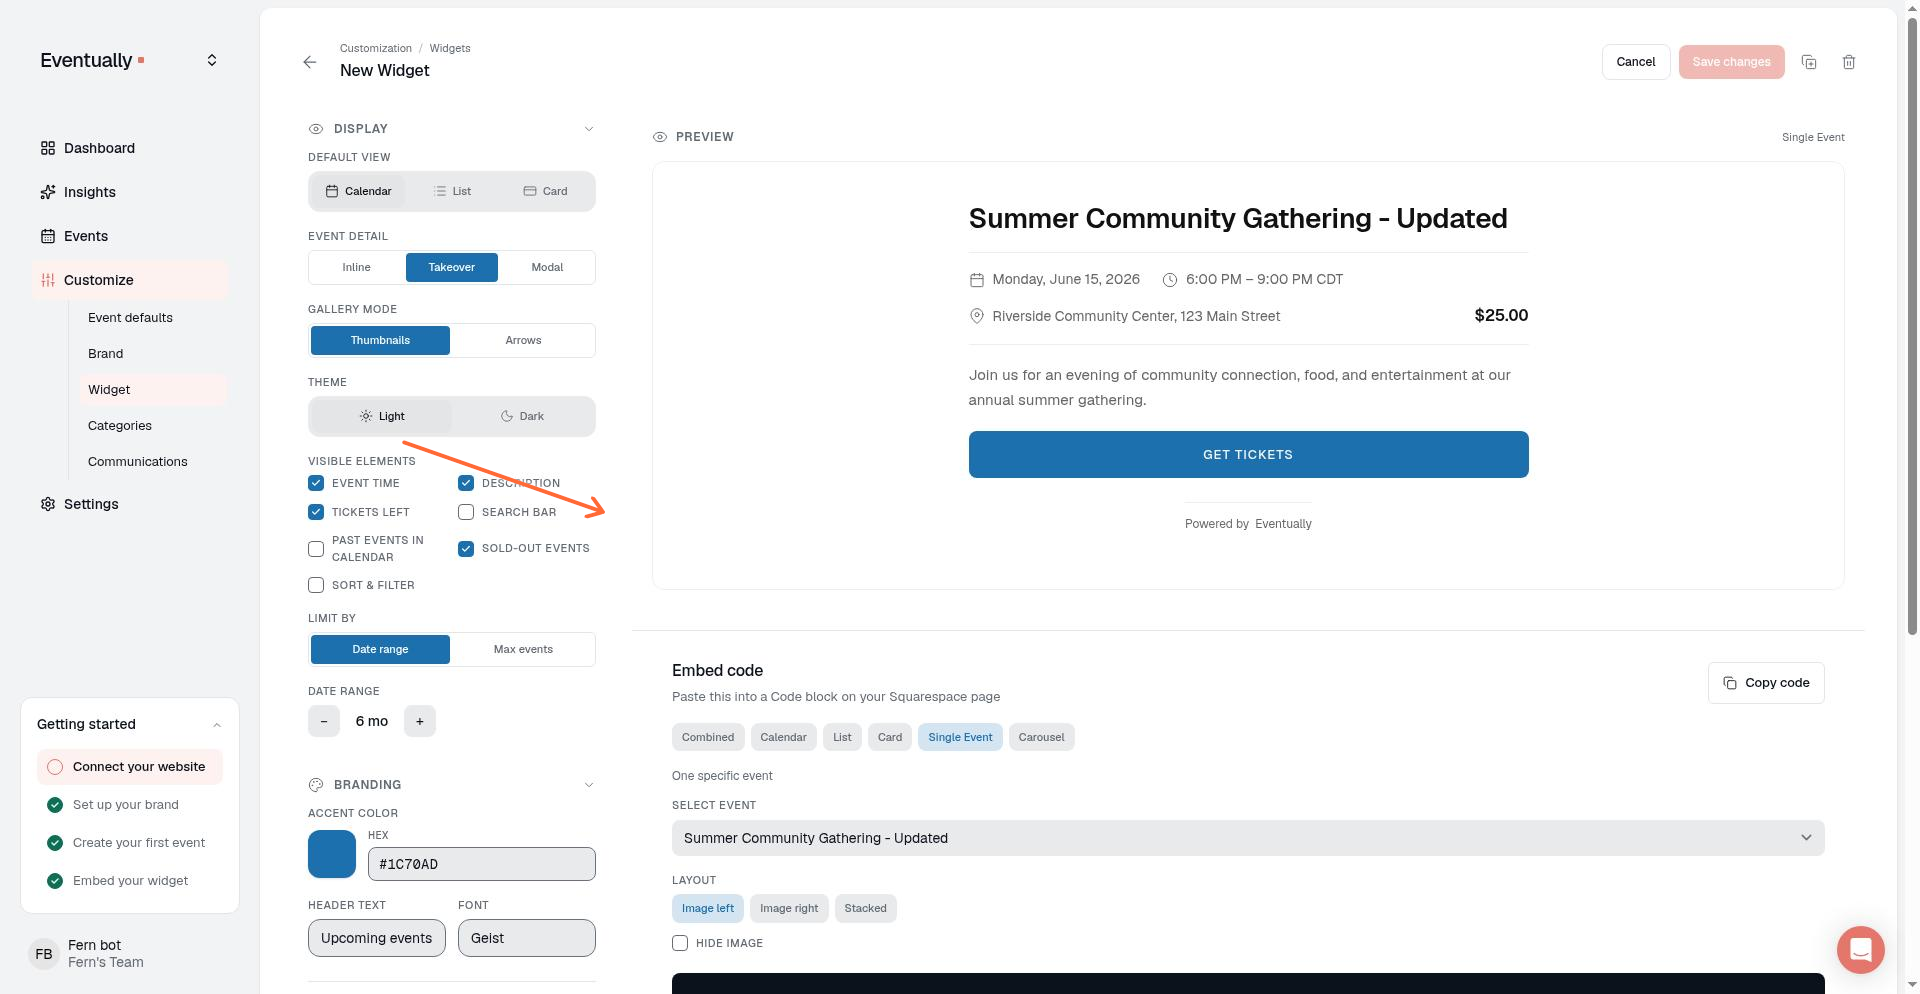
The single-event embed displays one specific event instead of a full calendar. Use it to highlight a featured workshop, class, or event on a dedicated landing page, or when you want registration to be the primary focus without calendar navigation.
Choose an event
When you create a single-event embed, the widget builder shows a Select Event control. Choose the event you want to display. The selected event is saved to the widget configuration, not to the embed snippet itself.
Select a layout
The Layout control determines how your event appears:
Image left: Displays the event image on the left side with event details and registration on the right. Best for wider pages where you want a balanced, horizontal presentation.
Image right: Displays the event image on the right side with event details and registration on the left. Use this when your page layout favors right-aligned visuals.
Stacked: Displays the event image above the event details and registration form. Best for narrower columns, mobile displays, or when the image should lead visually.
Hide the event image
Turn on Hide image to remove the event image entirely. The registration form and event details fill the content area without any image placeholder. This is useful when your event has no image, or when you're embedding the widget on a page that already features event imagery elsewhere.
If your event doesn't have an image uploaded, the widget automatically hides the image area regardless of the toggle setting.
Preview and embed
The embed code for a single-event widget only contains the widget ID. The event is resolved server-side when the widget loads, so visitors see the selected event's details and registration form. Changing the event in the Widget Builder and saving updates every existing embed automatically, with no need to re-copy and re-paste the code.
Older single-event embeds that still include data-event-id continue to work and take precedence. You don't need to replace a working embed just to remove the attribute.
If no event is stored on the widget, the single-event embed falls back to the next upcoming event from your site.
Custom CSS in the Advanced section applies to single-event embeds as well. You can fine-tune spacing, typography, or other styling beyond the layout options.
The hosted public event page at /e/:id uses the same underlying single-event widget configuration. Where an embed is placed inside a Squarespace page you control, the hosted page lives on Eventually and adds page-level chrome such as a brand backdrop, logo, and See all events → link. Both surfaces read from the same event data and registration flow. The hosted page appearance is controlled in Event Defaults under Public event page defaults.
Widget embed and SEO
The widget embed shell is always marked noindex so it does not compete with the hosted public page in search results. For registration and SEO, use the /e/:id link as the canonical public URL. For more about indexing rules and social metadata, see Public event page indexing and SEO.
How we know your widget is live
After you publish the page with the embedded widget, we detect when the widget actually renders on your live site. This happens automatically in the background.
Previewing the widget from within your Eventually dashboard does not count as a live placement. Only visitors loading the widget on your published Squarespace page trigger detection.
We record the first time the widget is seen on a live site and the host domain where it appeared. We store up to 20 distinct host domains and up to 20 page URLs, removing duplicates and omitting query strings and fragments. This helps confirm your embed is working and track where your widget is running.
Widget detection relies on the visitor's browser and can be limited by privacy settings, ad blockers, or network restrictions. If your widget is visible on your site but has not been detected yet, the embed itself is still working correctly.