
Date, time, timezone, and location autocomplete
When you create or edit an event in Eventually, you set the date, time, timezone, and location.
In the event editor, set the start and end times for your event, including the time zone. We store the event time with the time zone you select and display it in the event's time zone on the public event page, calendar widget, and in attendee emails. For recurring events, that same Time zone also drives how session dates are generated, so daily, weekly, and monthly occurrences stay on the intended local calendar day, including evening events in US time zones. See Creating recurring events for schedule setup.
When you change an event's Start date or time, we move the End by the same amount, so the event keeps its current duration. This works the same across the event editor's date rows, the event wizard, the Date and Time modal, and the Edit event drawer, for new and existing events. Start-minute shortcuts that only adjust the start minute do not move the End; change the Start itself for the End to follow.
An event's end time can't be earlier than its start time. If you set an End that lands before the Start, saving is rejected with the message “End time can't be before the start time.” An end time equal to the start time is valid, and you can leave the end time unset. The same rule applies to each individual date in a multi-date event, where a rejected row shows the error inline without closing the editor. Start and End fields across the event editor, event wizard, and date modal use your team's Date format setting rather than your browser's locale.
Location types
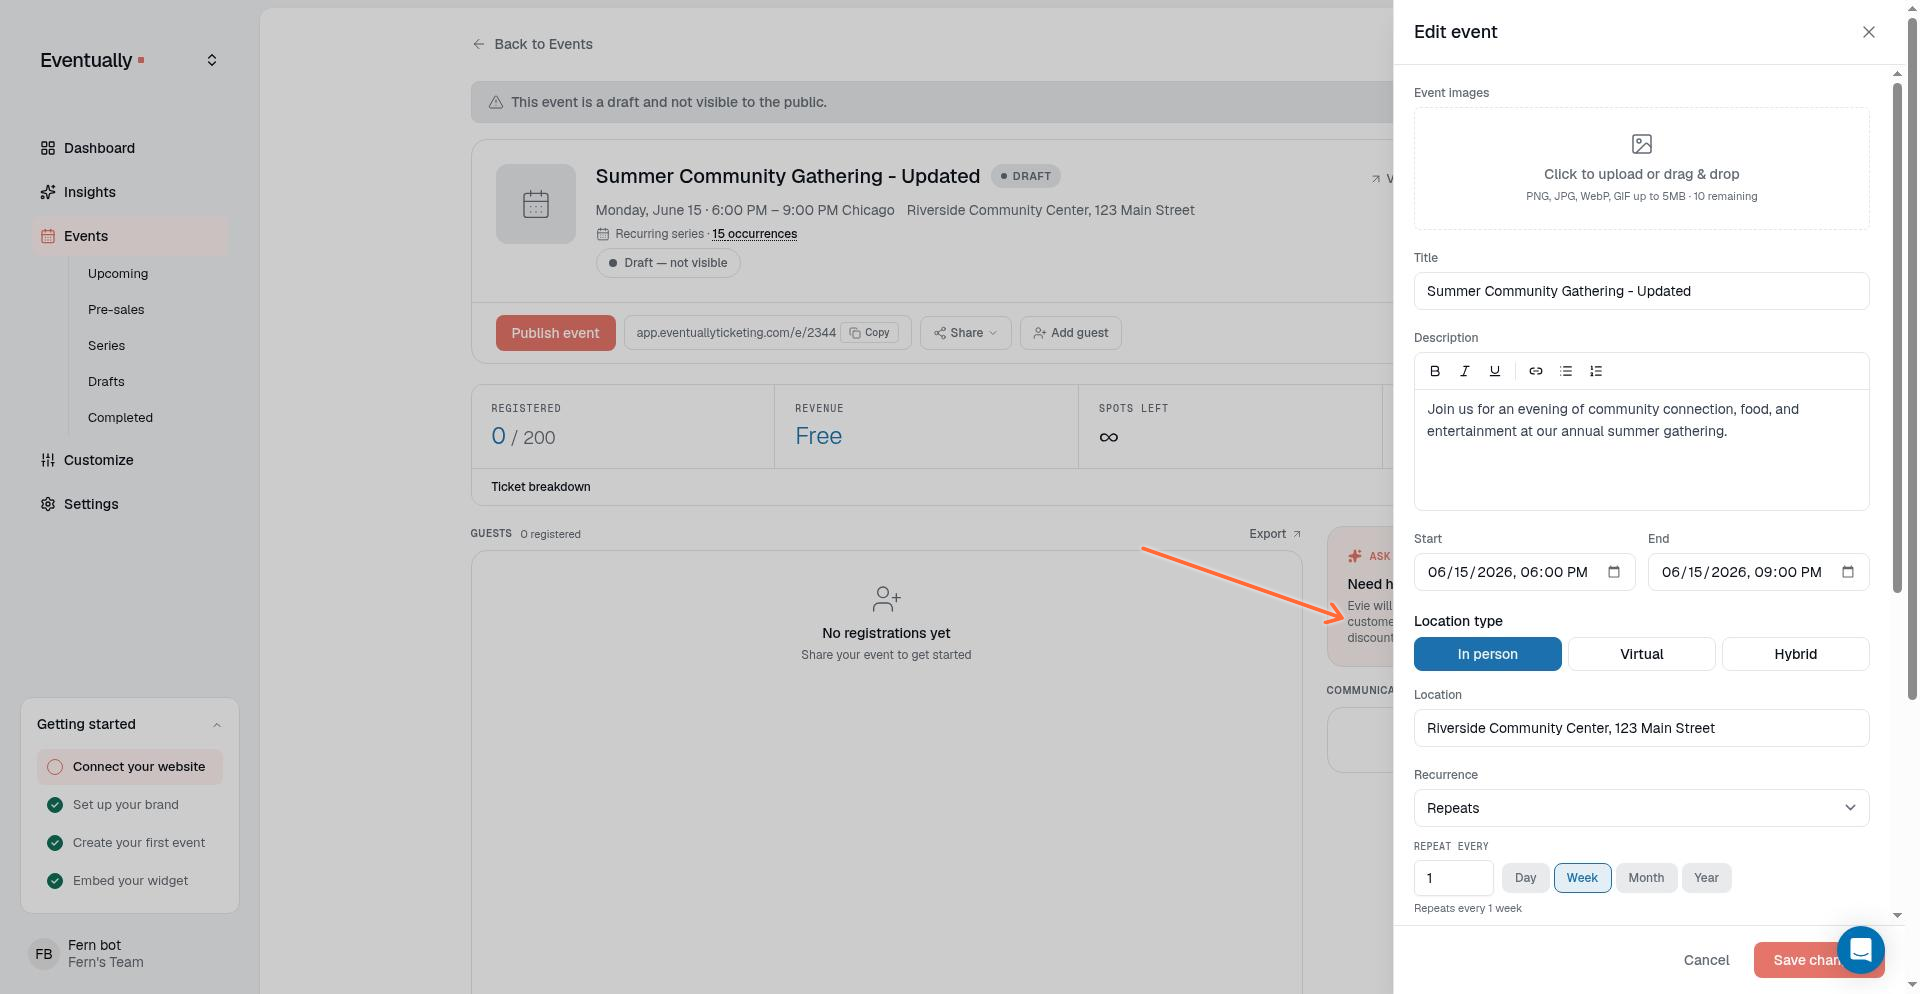
Each event uses one of three location formats. The selector appears in the Location card of the event builder and in the Edit event drawer.
In person: Enter a venue name and address. The address is shown on the public event page and calendar widget unless you hide it until registration.
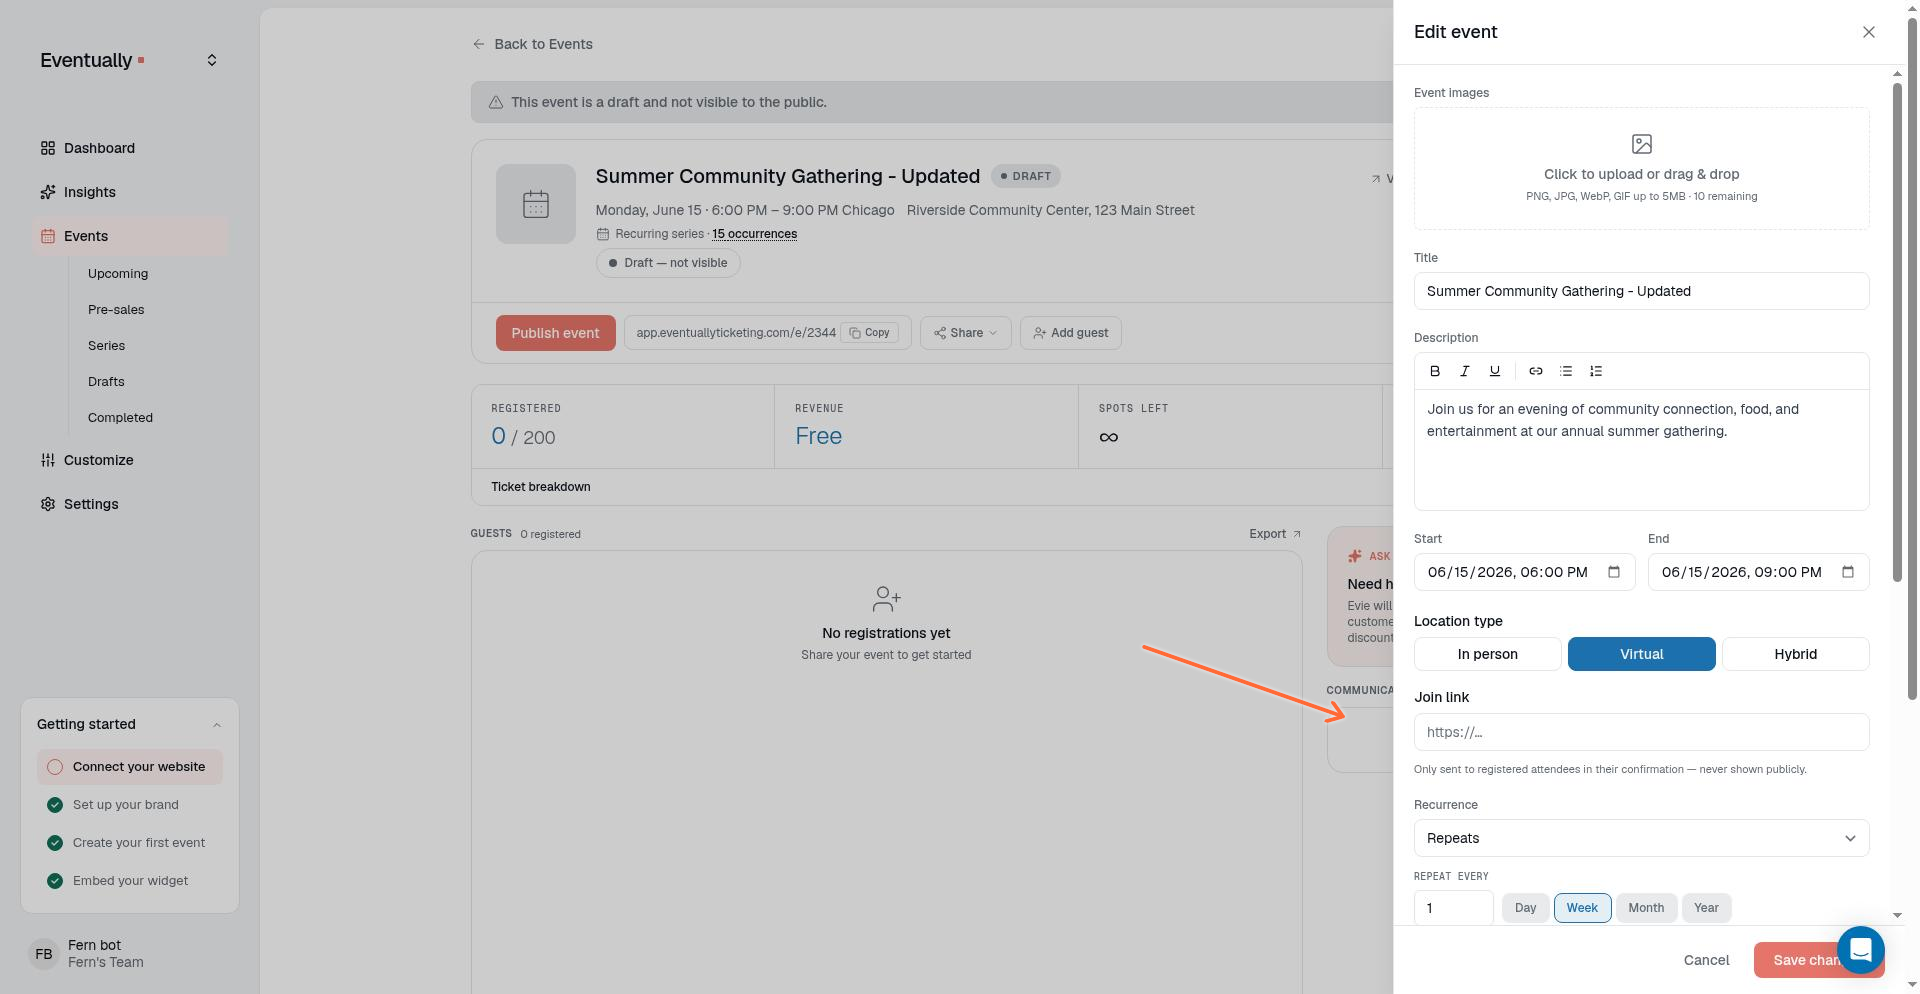
Virtual: No public address is shown. Enter a Join link that is sent only to registered attendees in their confirmation.
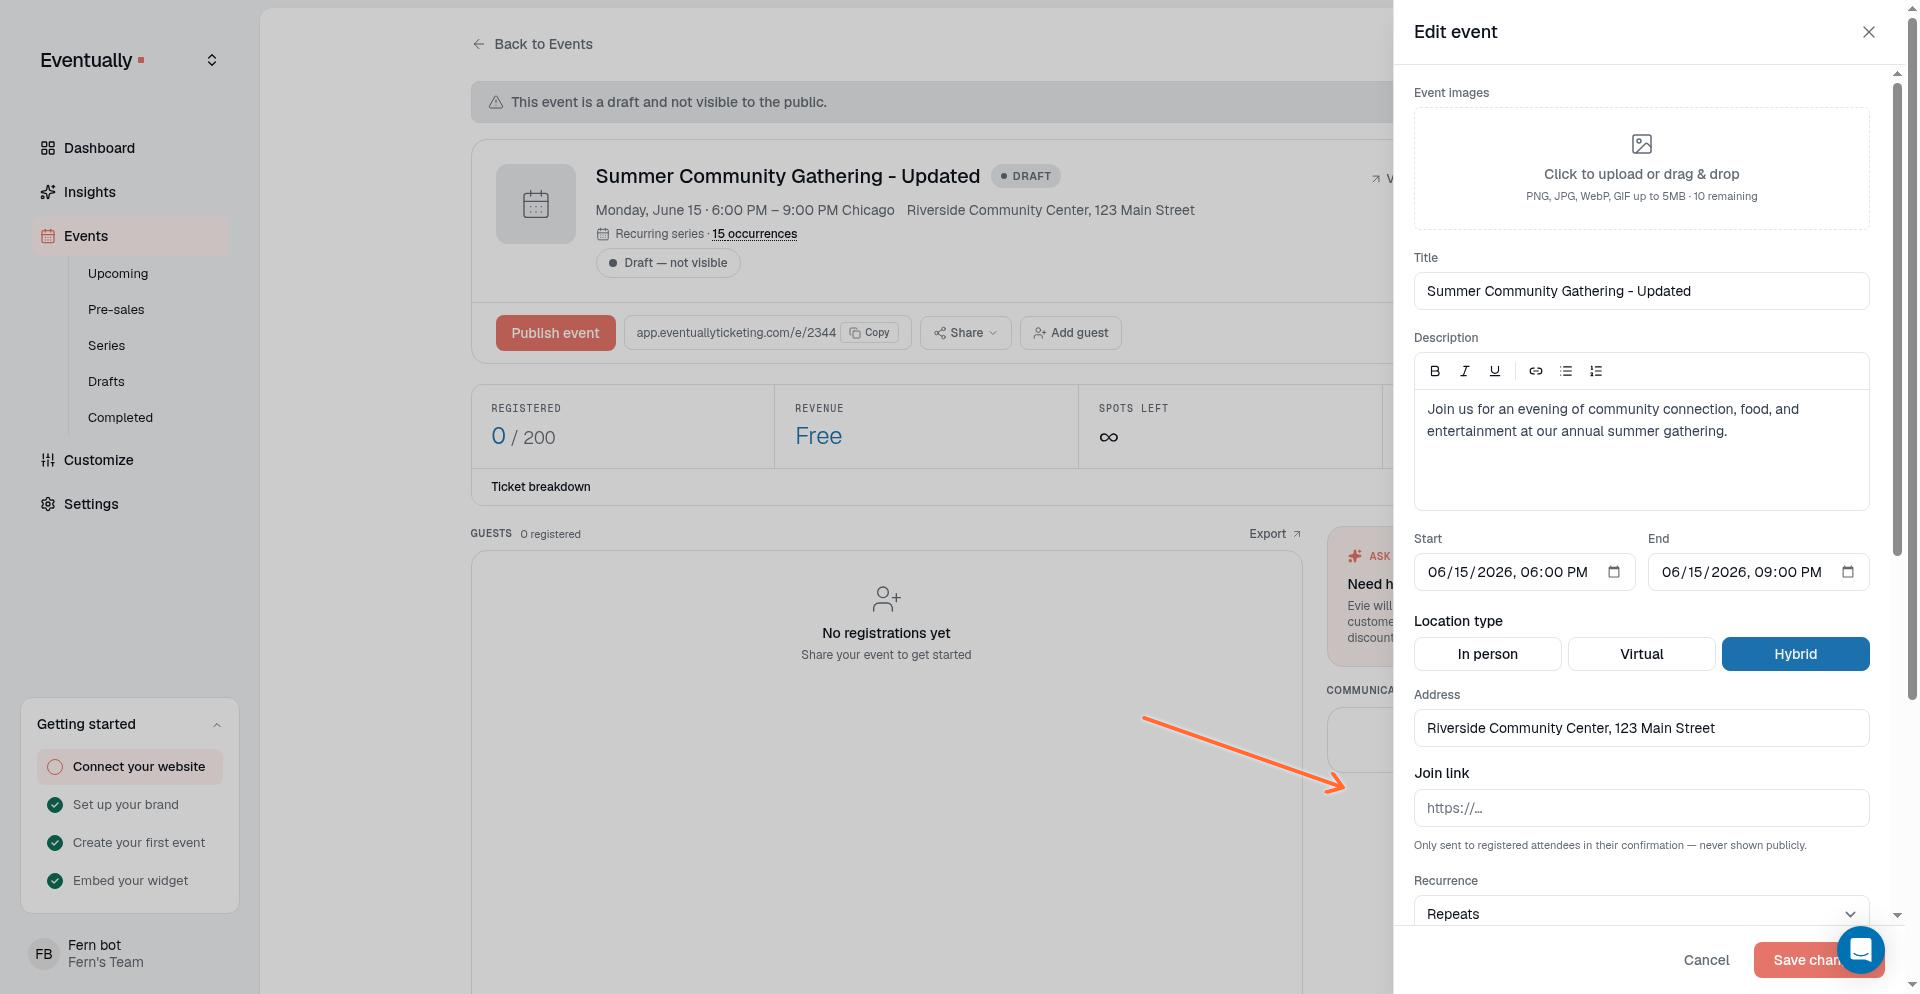
Hybrid: The address is shown publicly unless you hide it until registration. Enter a Join link that is sent only to confirmed registrants.
The Join link field includes helper text: Only sent to registered attendees in their confirmation, never shown publicly.
Location autocomplete
Location autocomplete is available in the event builder and in Event Defaults. There, for in-person and hybrid events, start typing in the address field to search for and select a validated venue address from the autocomplete suggestions. The Edit event drawer uses a plain text Address field instead, so type the address without autocomplete suggestions.
Hide a location until registration
For in-person and hybrid events, the Location card includes a Hide location until registration checkbox. When you enable it and the event has location data, every pre-registration surface (the public event page, embedded widgets, calendar files, and search listings) shows Location shared after registration instead of the venue.
The real venue is revealed only after someone registers: on the confirmation page, in confirmation and reminder emails, and in the registered attendee's calendar file. Virtual events do not show this option and keep their existing private join-link behavior.
The setting hides the venue, not the event: event details stay publicly discoverable. A forwarded confirmation link, or an address typed into the event description, can still reveal the venue. On a recurring series, changing the setting applies to every occurrence.
Set up a virtual or hybrid event
In the event editor, find the Location card.
Choose Virtual or Hybrid.
Enter the join link in the Join link field.
Save the event.
When you select Virtual, the editor shows only the Join link field:
When you select Hybrid, the editor shows both the Address field and the Join link field:
Where attendees see the join link
After someone registers, the join link appears on the confirmation page and in the confirmation email. It is never shown on the public event page or calendar widget.
Hosts can verify the link by completing a test registration and checking the confirmation page and post-registration email.
Save a default location for new events
Open Customize → Event defaults to set a starting location for every new event you create. The default uses the same structured format as the event builder: choose In person, Virtual, or Hybrid, then fill in the venue name, address, and optional join link.
When you start a new event, the builder pre-fills these location fields from your default. You can change them for any individual event.
Related guides
Create an event: Create a new event from scratch
Edit an event: Modify event details after creation
Creating recurring events: Set up repeating schedules for classes and workshops
Sharing a direct event link: Share the public event URL